How to assemble RC model airplanes, from an Almost-Ready-to-Fly (A-R-F) kit
RC model airplanes that are assembled from an Almost-Ready-to-Fly (A-R-F) kit, require accurate building. Lots of tips and techniques, ensure your success.

First things to do
The arrival of RC model airplanes, at your home, is always an exciting event! For the larger models, the size of the box always amazes me!
Your first task, is to carefully inspect your precious cargo, for any signs of shipping damage. If there is, then advise the shipping company immediately.
Next, remove the shipping carton and admire the kit box, with its many multicolored photographs of the completed model.
The main components are generally bagged in clear plastic. I prefer to leave them packaged, until required. At least keep the bags-they can be useful! ( I will explain later.)
Locate the manual, and find the LIST OF CONTENTS. Now check-off all the components. If anything is missing or damaged, now is the time to find it, not when you need it for assembly!
Notify the supplier of any problems and if they are a reputable company, replacement parts should be on their way. Now is the time to decide if any parts need replacing.
Sometimes I find items like tanks and hardware, are not up to standard, and I have yet to find a good pair of wheels, in today's RC model airplane kits. (May be I am too hard to please!)
The Model Airplane Covering
Because the box has been subjected to extremes of temperature, since it left the factory (somewhere in Asia), the covering will probably needs shrinking, in spots.
If you know what material was used, then you should also know the correct temperature, to set on your iron. See Model Airplane Covering for more information.
If the covering material is a mystery, then proceed with extreme caution! Start at a low temp. and increase slowly, especially on edges and joints. It may be preferable to leave a few wrinkles rather than wreck a complete unit.
I came across this information, from the Great Planes web site-you may find it useful as well.
The Manual of RC Model Airplanes
Now take the manual, find a quiet, comfortable spot, may be a mug of your favorite brew and read it, from cover to cover. This will familiarize you with the process and make things a lot easier as you assemble your latest pride and joy.
Building RC model airplanes, from an ARF kit, is not as quick as you may think. I find some of the advertising very misleading-do not expect to be flying tomorrow! Allow as much time as it takes and enjoy building an accurate, well aligned and balanced model, that will fly well!
Balancing
Talking about a "well balanced model" brings up the most important point, when it comes to RC model airplanes-IT HAS TO BALANCE AT THE CORRECT CENTER OF GRAVITY POINT!
The CG (Center of Gravity) will be noted in the manual. Take a look at this early in the process. I HATE to add weight to any model, and much prefer to move components, like the radio gear, as far forward as possible.
Many times, I have mounted the battery pack, in front of the firewall. As long as it is securely mounted (I use plastic tie wraps) and wrapped in a plastic bag (that's one use-as promised), all will be well.
Do not forget to balance the model LATERALLY. A heavy wing will result in a model that is continually rolling, in the direction of the heavy wing-not a good state of affairs!
If, despite all your best efforts, weight must be added, then ensure that it is securely attached, as far forward as possible.
Glue Joints
The glue that is used in the construction of these RC model airplanes, appears to be a kind of hot melt. Check as many joints as you can find access to and "wick" in a small portion of CA adhesive into the joints. This process will increase the life of your model and add zero weight.
Please take a close look at the firewall. Make sure it is securely attached to the fuselage structure. If there are any doubts, take steps to fix it. I have fiber glassed the whole firewall before-the extra weight was a help too!. At least apply a coat of fuel proofer to the firewall. I use a slow drying epoxy, thinned 50% with alcohol.
Wing Panels
Remember those large plastic bags that the wings were wrapped in? These can be used when joining the wing panels together.
Tape them to the wing panels, then apply slow drying epoxy, to the wing roots and the dihedral brace, push everything together and use tape to keep things securely aligned, until the epoxy sets. Wipe off the excess glue with alcohol. The plastic bags will prevent epoxy from spoiling those beautiful, brand new, wing panels!
The mention of the dihedral brace, reminds me of another point. It is made from a good quality hardwood material, is it not? I have come across soft balsa dihedral braces, believe it or not! If you have any doubts, then replace it with one made from aircraft grade plywood. (available from your local hobby shop.)
The RC Engine & Cowl
Another worthwhile modification, that probably applies to all RC model airplanes, is the cowl attachment screws. If the screws are self-tapping sheet metal screws, then please apply CA adhesive, to the hole, after you have "tapped" it, when you run the screw in the hole, for the first time. This re-enforces the threads, and will give you a longer thread life. This should be applied to all self-tapping holes.
Also, cut a short length of fuel tubing (about 1/8"long) and run it on the screw, prior to assembling it to the cowl. This measure, along with using a nylon washer, under the screw head, will ensure the cowl is "soft mounted" and less prone to cracking.
Final Points
The last point I will mention, is concerning the accuracy and quality of your work. The bulk of the building was done at the factory and today's standards of construction of RC model airplanes are very high. However if the wing is assembled with a twist, or not aligned correctly with the "tail feathers", you will finish up with a flying nightmare! If you take your time and enjoy the process, you will be rewarded with a well flying, longer lasting model.
The building and flying of RC model airplanes is a fascinating hobby that I have been involved in for many years. I hope you have found the information provided here, interesting and useful.
The E-Flite DHC-2 de Havilland Beaver

This ARF RC model airplane is a delight to build and flies very well.
For those who would prefer it this model can be flown off water. The mounting hardware is included but not the floats themselves.
It is perfectly practical to be able to switch from land gear to floats, thus giving this model extreme versatility!
Visit this page , to see more details and a review of this example of the latest Electric RC Planes.

Get Gloster Gladiator Profile eBook Free

Don't worry your e-mail address is totally secure.


Recent Articles
-
The Bristol Bulldog vintage biplane, of the RAF, in 1930
May 22, 23 10:47 AM
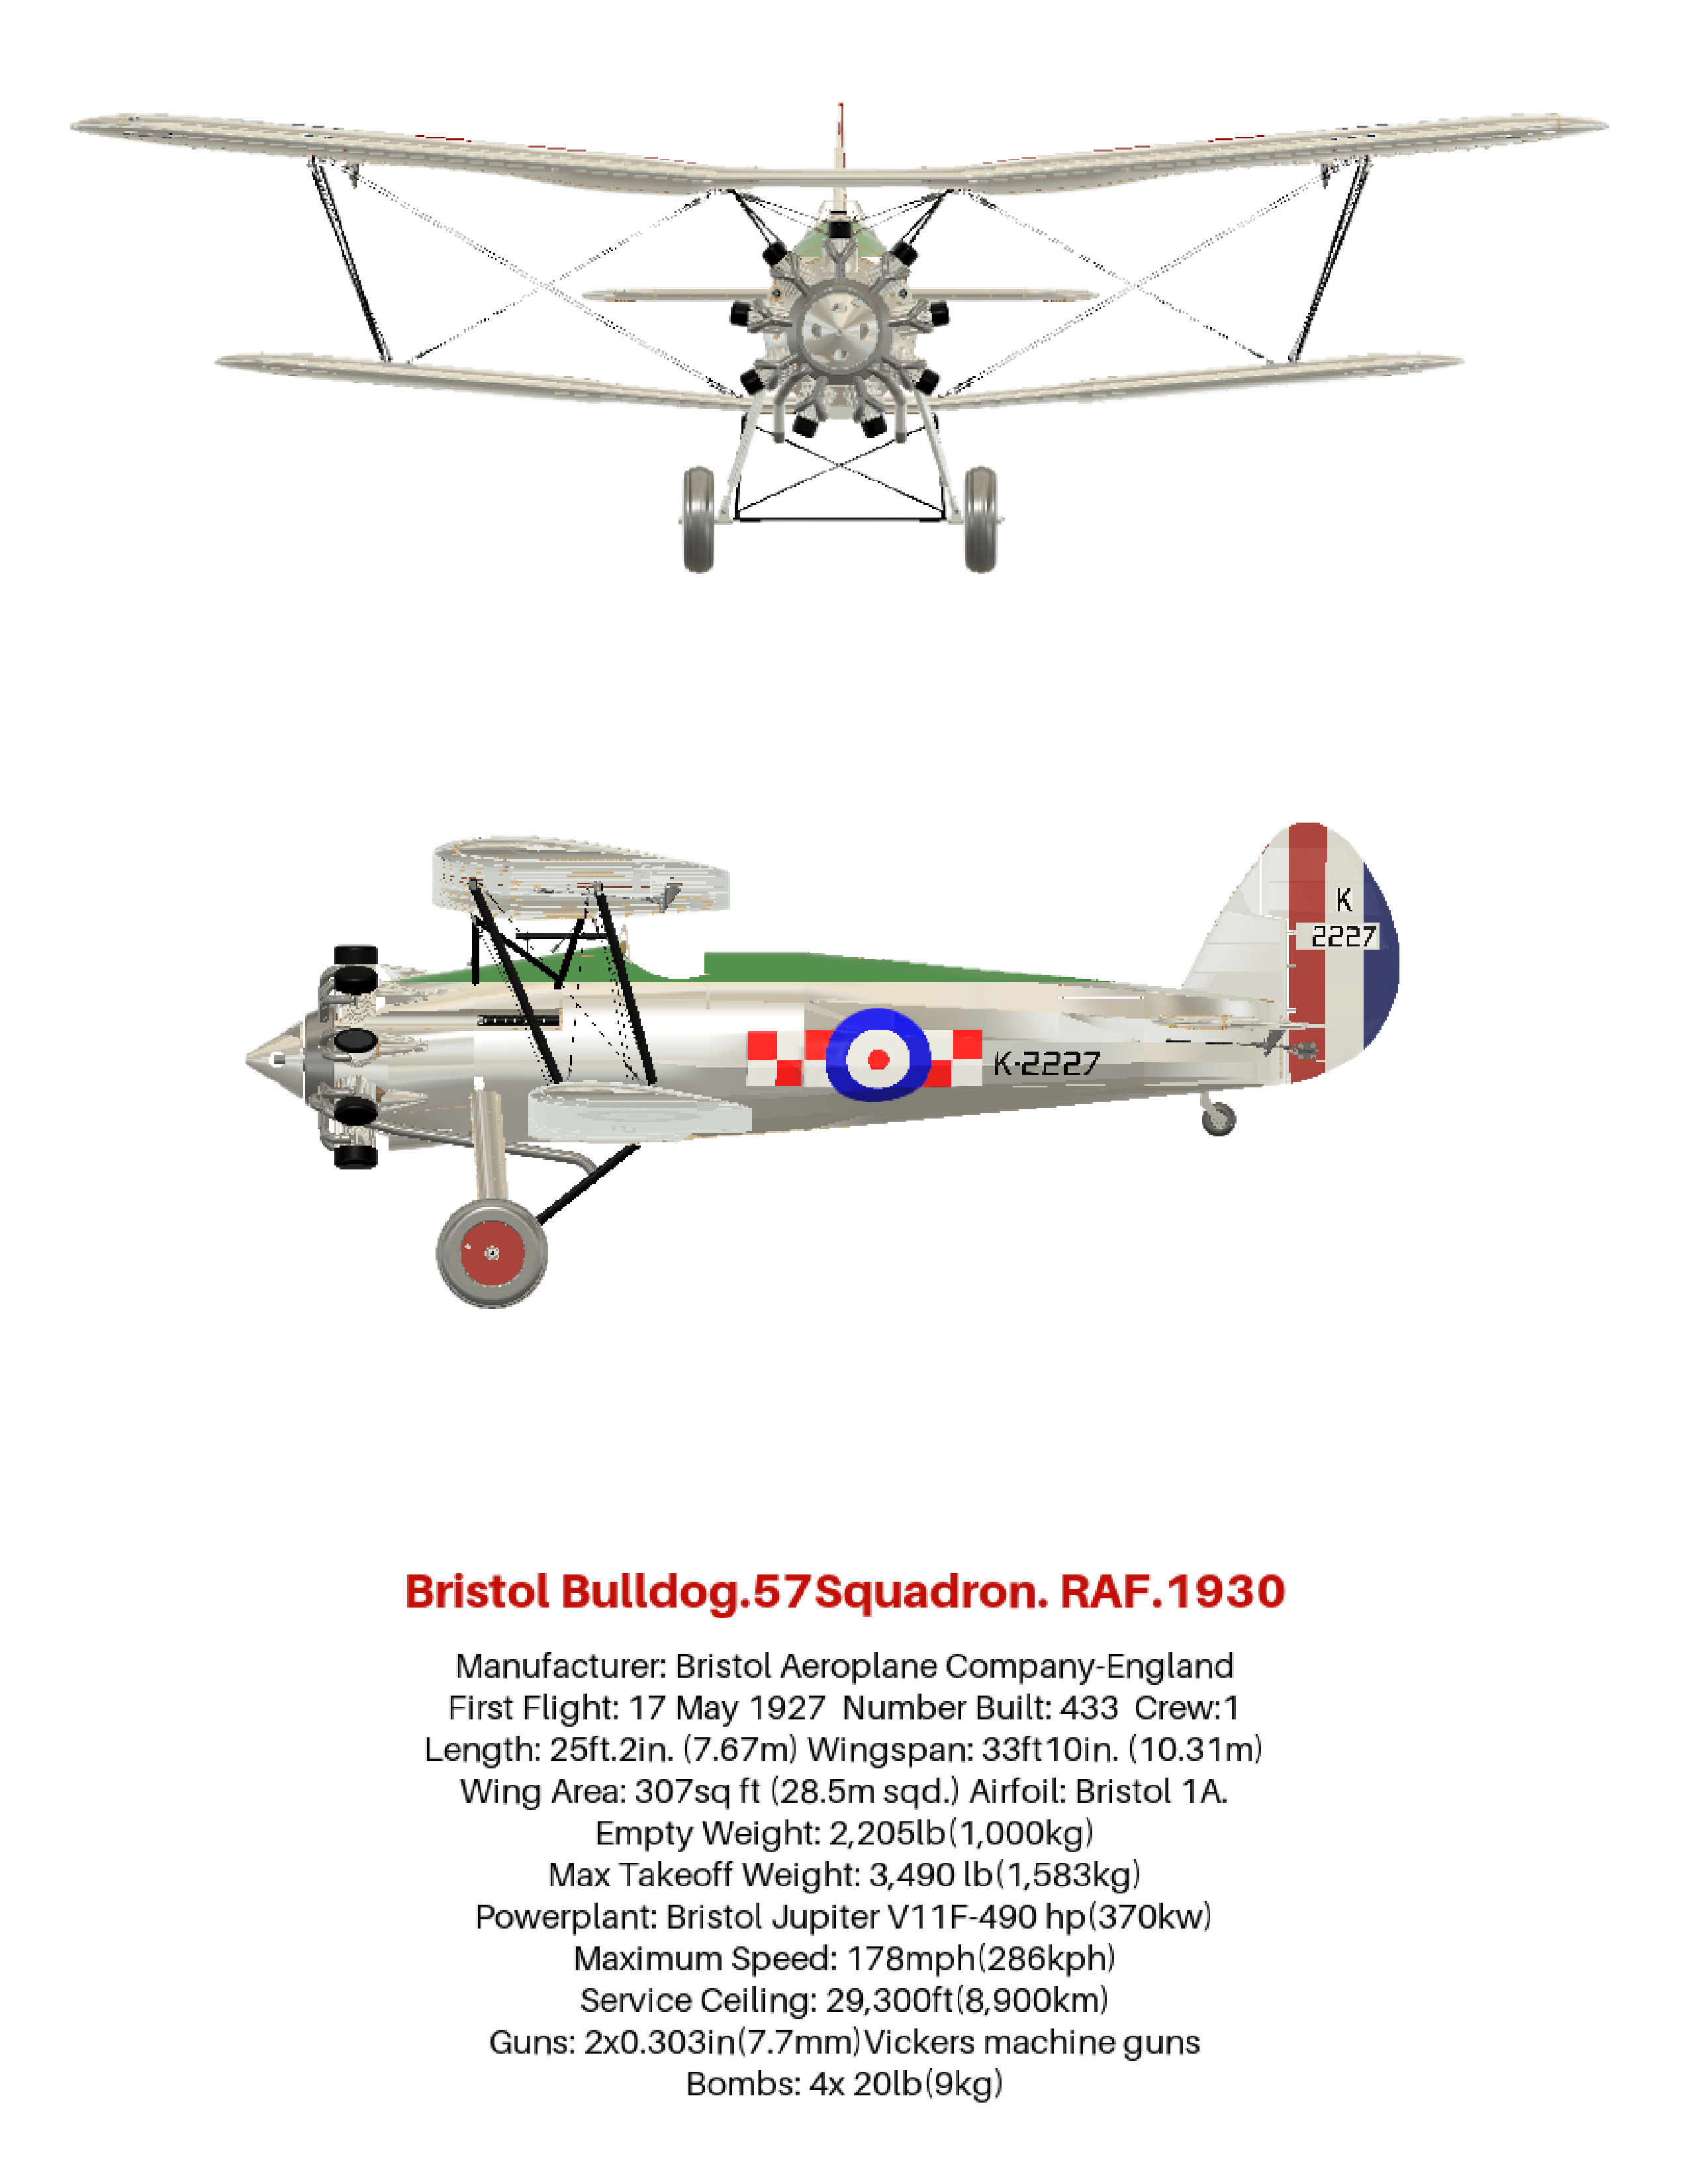 How the aviation art, of the Bristol Bulldog vintage biplane, was produced, using 3D software. Included are photos and links to many aviation gifts, from Zazzle
 -
Aviation gifts For All Airplane Lovers
Apr 20, 23 11:12 AM
 Aviation gifts for every occasion. Give your airplane fanatic friends and relatives the present they will really appreciate! Can be customized to make it truly unique.
 -
RC Retractable Landing Gear: The JP Hobby ER-005 Metal Strut Set.
Dec 19, 22 01:55 PM
 Full details of RC retractable landing gear. For models up to 6 Kg (13.2 lbs). Steerable nose wheel and sequencer for gear doors and brakes. For grass strips.
 -
FLEX RV-8 70CC FLS:ARF and ARFSV.
Nov 02, 22 02:45 PM
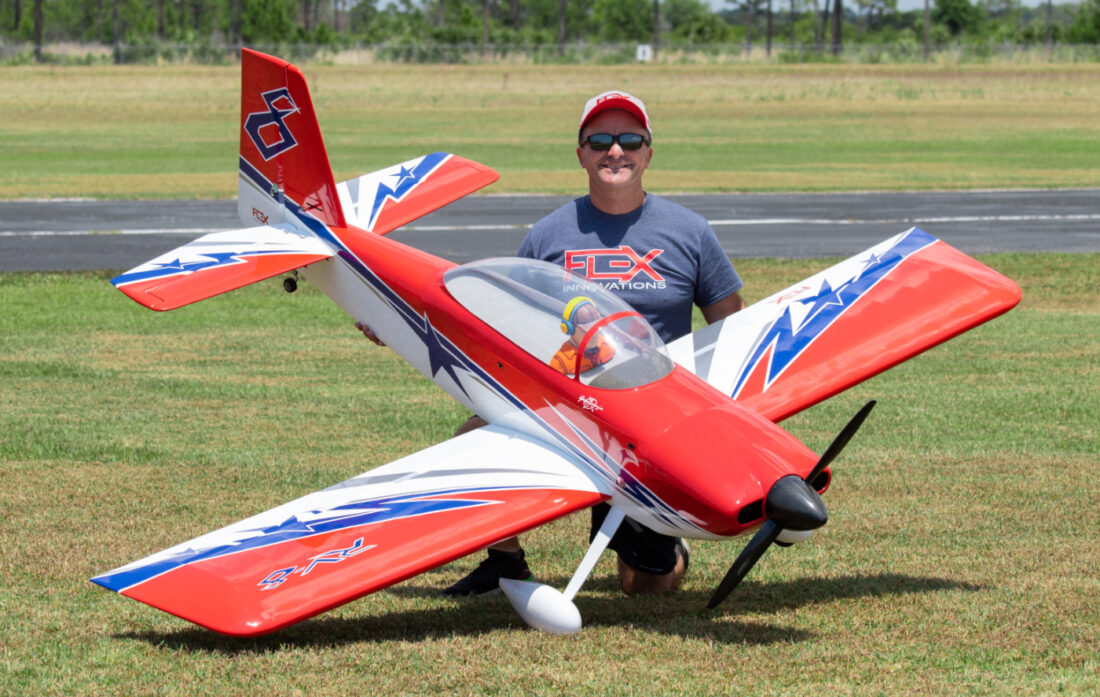 The Flex RV-8 70cc, 35% Scale, 3D RC Airplane. Super lightweight and gas or electric power. Very complete and fast assembly.
New! Comments
Have your say about what you just read! Leave me a comment in the box below.