RC Airplane Plans of the Hawker Demon
The above image of the RC Hawker Demon is interactive. You can use your mouse wheel to zoom in and out and if you press the shift key and the wheel you can rotate the image.
To return the image to the start point click on the house symbol in the top right hand corner.
The icons at the bottom of the screen have various effects but the "explode" icon is very spectacular!
The icon at the extreme right will give a full screen image.
All of this is available as I used Fusion 360 3D software to design this 1/5 scale Hawker Demon.
My Version of the Hawker Demon
The 3 photos below show 3 versions of the Demon, that is virtually the same as the plans depicted here. It was built many years ago and was originally a Hawker Hart bomber.
It was powered with an O.S. 120 4-stroke and I flew it for many years.(Photo #1)
I then modified it to a Demon fighter and changed the colour scheme. The power was now a Laser 150 4-stroke.(Photo#2)
The final version, as shown in the third photo, was also flown for many years and was well known all over southern Ontario and Florida.(Photo#3)
This is an easy flying and landing model that will not disappoint and should give you years of service as well!


PAGE CONTENTS
Please note that the above content rectangles are "Hot" links to the sections on this page. Each section has a "Return to Page Contents" link that will bring you back here.
Specifications
Hawker Demon
- Scale: 1/5
- Wingspan: 89.4" (2270.8 mm)
- Length: 71" (1803.4 mm)
- Wing area: 1972 sq. in.
- Weight: 18 lbs
- Wing loading: 21.04oz./sq. ft.
- Power: 1.8 Glow, 35cc gas, Power 160,(10S batteries)
- Channels Required: 4 min.
- Servos: (4) - Standard size 120oz.in. torque min,
- Top wing incidence: +3.15 deg.
- Bottom wing incidence: +3.15deg.
- Tailplane incidence: +2 deg.
- Bottom wing dihedral: 4 deg.
- Top wing dihedral: 1 deg.
- Right thrust: 0 deg.
- Down thrust: 0 deg.
- Sweepback (Upper): 5 deg
- Balance point (CG): 4 21/32" from L.E. of top wing center section
Fuselage Details
The fuselage construction starts with making the fuselage sides from 3/16" thick balsa, as shown in photo #F1. Don't forget to make one side left hand and one side right hand! (Handed by the score and "crack" lines)
The fuselage top is made from 1/8"ply and 3/16" balsa. The top surface is flat.(Photo#F2)


Now we can start the basic fuselage box construction. Here you will see the advantage of interlocking construction.
Build the front part of the box first-the part that has no taper. This can be done "dry" with no glue. Tape can be used to hold things together and ensure everything is square. Use your precision square everywhere.
Only when you are completely satisfied with all, "wick" the CA into every joint.
The rear tapered end of the Hawker Demon fuselage can now be assembled.
Formers can be glued to the fuselage top, ensuring squareness again. Then the sides can be folded inwards and the fuselage bottom added. You should now have a perfect basic box that is straight and true. (See photos #F3&#F4)
Now the outer formers can be added, then the 1/8" dia. dowel stringers and the 1/8" balsa sheeting.
The gun troughs can be added as well as the other smaller details.(See photo #F5).


The final fuselage will look like this. The cowl is made from balsa, but should be fiber glassed for durability. The Vickers machine gun and the Lewis gun are made from balsa and ply. The exhaust stacks use balsa dowel.
Power Options
Electric
The motor is an E-Flite Power 160.The batteries are 5S 5000Mah. They are retained by a velcro strap and can be changed quickly.
Note that the upper hatch is retained by rare earth magnets.


Gas engine
The gas engine shown is the DLE 35RA. The muffler is concealed inside the cowl and makes for a neat installation.


Tail Section


Tail construction of the Hawker Demon uses the well proven 1/16" balsa core method.
Ribs are added to both sides of the core and the whole assembly is bolted to the fuselage. This makes for a more scale appearance and means that replacement, if ever required, is really simple.
Robart hinge points are used and Dubro horns and hardware are suggested.
Please note that the 1/16" balsa covering is removed from the fin base, to show the internal details.
Upper Wing
The upper wing is constructed in three parts-
- The Center Section-See Image #UW1
- The Left Wing Panel-See Image #UW2
- The Right Wing Panel-See Image #UW3
An Aluminum tube aligns the 3 parts and the outer panels are bolted into position.


To start construction, the wing ribs (Typically as #UW$) are vertically slotted onto the Shear webs (#UW5& #UW6).
Note that all these parts have tabs on the bottom edges. Keep these in intimate contact with a flat building board. They will be removed when the initial construction is finished.

This image shows the arrangement using magnets and a steel surface on top of the building board. See here for more details of magnetic building.
Note that a full size plan is shown. This is the only time this is recommended in the building of this Hawker Demon. The upper wing has a sweepback of 5 degrees and thus to keep parts in the correct position this is a required process.

Now we take a look at the aileron construction.
A 1/16" balsa core is used with ribs added top and bottom.
Hinging uses 2 Dubro Heavy Duty Nylon Hinges and a wire at the root.
Lower Wing
Construction is very similar to the upper wing, but is simplified by the omission of ailerons.


The above images show the three elements of the lower wing.
Note that #LW1&#LW3 has the top sheeting removed to show the construction details.
Here we see how the upper and lower panels are assembled, for transportation, by using the special strut between the 2 panels.
It is held in place with long rubber bands.
The front landing wire must be unclipped from the fuselage but the remainder of the flying wired can stay intact.
Parts Templates

There are four sheets similar to the image plus one 'E' size sheet.
These can be printed out full size and then glued to the respective sheet of balsa or ply. They can then be cut-out with a saw or hobby knife -OR you could order a set of laser cut parts and save a TON of time!
See below for a list of all the material needed for the cut parts-
- 3/16"x6"x36" Balsa-6 required.
- 1/4"x6"x36" Balsa- 5 required.
- 1/8"x6"x36" Balsa-12 required.
- 1/16"x6"x36" Balsa-4 required
- 1/4"x6"x36" Birch Ply-1 Required.
- 1/4"x6"x12" Birch Ply-2 required.
- 1/8"x6"x36" Popular Light Ply-11 Required.
- 1/16"x6"x36" Birch Ply-3 Required.
- 1/32"x6"x24" Birch Ply-1 Required.
- 1/8"x6"x24" Birch Ply-1 Required.
Note that this is for parts production only. See BOM for balsa required for sheeting etc.
Landing Gear
The landing gear for the Hawker Demon is made up of custom manufactured parts, bent and straight piano wire and balsa fairings.
The custom parts are available and more details are shown here.
The wire parts and the axle are wrapped with copper wire and silver soldered.
Laser Cut Parts
- We now can supply a set of laser cut parts for the Hawker Demon made from the original model airplane plans
- Parts are supplied by Bob Holman Plans- the premium RC airplane laser cutter in the U.S.
- Price of the set is $430.00 USDPlus shipping costs.
- If you order through this site, you will receive an e-mail order receipt from PayPal.
- This set is a "short kit" of a large scale model aircraft and includes all the balsa and ply parts, laser cut to shape but no sheet or strip balsa is included.
- Note also that no hardware is supplied.
- Please note that the Demon uses balsa and ply construction for the cowl so no fiberglass parts are required.
- If you have any questions. please Contact Us.
Price of the Laser Cut Parts for the 1/5 Scale RC Hawker Demon=$430.00USD plus Shipping & Handling Costs
BOM (Bill of Material)

The BOM consists of 22 sheets and lists all the parts needed to build the RC Hawker Demon.
Sheet 1 is shown above to give you a good idea of what to expect. Note that there are hot links that will take you to the appropriate supplier page. The Bom is included in the plans package.
Custom Built Parts
There are 4 parts that can be made to order, from Mr. AeroDesign in Quebec in Canada.
- Landing Gear Bottom Bracket-Drawing # C2020LAG7-2 required (See Photo #CB3 below)
- Landing Gear Strut-Drawing # C2020LAG6-2 required (See Photo #CB4 below)
- Landing Gear Top Bracket-Drawing # C2020LAG9-2 required (See Photo #CB5 below)
- Landing Gear Strut Pin-Drawing # B2020LAG8-4 required (See Photo #CB6 below)


Note that 2-strut assemblies are required per model. The price, from Mr.Aerodesign is $245.00 CAD plus shipping cost, for the complete set of struts and upper and lower brackets. I suggest you contact Martin Rousseau. the owner of Mr.Aerodesign and say you would like a set of oleos and brackets for the Hawker Demon. Sorry to make this complicated, but as soon as Martin is able to add these struts to his website, I will add a direct link here.
As an alternative just contact me and I will be glad to take care of the ordering.
PLANS of the R.C Hawker Demon
We are offering the plans as PDF files only. There is a total of 101 sheets.(236Mb) They can all be printed on 'A' size sheets. A few sheets need to be printed full size and these are listed below.
Because of the interlocking construction, the majority of the model can be built on a flat building board, referring to the printed sheets for information.
The sheets that do need to be full size are listed below. I visited a local Staples store that has a 36" wide printer. I found them most helpful and they happily adjusted the size of the prints to ensure they were exactly at a 1 to 1 scale.
- X2020LC1to LC5- Only if you are cutting out the parts and not buying a set of laser cut parts.
- E2020TWGA-2&-3 Note that top wing has 5 degrees of sweepback and the ribs are parallel with the fuselage, so a full size plan is required.
- C2020LAG1&LAG2 These are the wire parts of the landing gear. (See this page for tips on wire bending)
- X2020LC6&LC7 These are the markings for the ShuttleWorth Demon. Look here.
Below are 6 examples of the sheets in the package-


The price of the complete package of 101 sheets plus the 22 sheets of the BOM is $75.00USD.
Total package size is 236Mb and I will use a cloud storage service to send them.
To Order the PDF files, Just click on the PayPal link and I will promptly email the packages to you.
Please note that you do not need a PayPal account and you can use your favorite credit card.
The Full Size Hawker Demon.
It is interesting to note that the Demon is part of the Hawker Hart family. The first Hart was a bomber and when it first flew in June 1928 it was faster than any fighter available to the RAF!
As a result Hawker developed the Demon fighter from the Hart.
Take a look here for some beautiful photographs of the Demon. This example is still flying and is part of the Shuttleworth Collection at Old Warden in the U.K. There is also a great video of the Demon flying!
 The Shuttleworth Collection Hawker Demon
Markings
The Shuttleworth Collection is a beautiful example of a renovated air classic.
It has been decorated in the colours of 64 Squadron RAF in 1937.


The plans package includes PDF drawings of the fuselage and wing markings as well as the 3 different sizes of numbers.
They can be supplied by your favorite vinyl markings company , or cut from Monokote as I have done before. The Monokote method produces results a little thicker than vinyl, but it is a more cost effect!
.")
.")
The above 2 images are an example of the drawings in the plans package.
Scale Spinner
The unique scale shape of the spinner was a real challenge to produce economically. To machine one out of sold aluminum was a very expensive operation and hard to find a potential supplier.
The answer was to use the latest 3D printing technology -Selective Laser Sintering(SLS).


The material is a hard white nylon, that can be painted silver. As you can see, it has the cooling features that will help the electric version and will also aid in keeping a gas version cool.
If you would prefer a cone without the holes through it, please contact me and I can help you.
The register diameter worked out really well and the cone fits the backplate perfectly.
The supplier is Shapeways and the links below will take you straight to the purchasing page on their site.
Hatches

There are 3 hatches on the Hawker Demon.
The cowl hatch gives access to the main power batteries.
The rear hatch offers access to the rear fuselage and also enables the large middle hatch to be removed and thus gives full fuselage access.
The 3D image below shows in greater detail how the full fuselage is completely accessible. all hatches are retained by strong magnets.

This is a link to another page on this site, that has more details of other plans , designed by myself.
All are available as paper plans or PDF files that you can print locally.
Laser cut parts are offered for each of the RC airplane plans listed.
Get Gloster Gladiator Profile eBook Free

Don't worry your e-mail address is totally secure.


Recent Articles
-
The Bristol Bulldog vintage biplane, of the RAF, in 1930
May 22, 23 10:47 AM
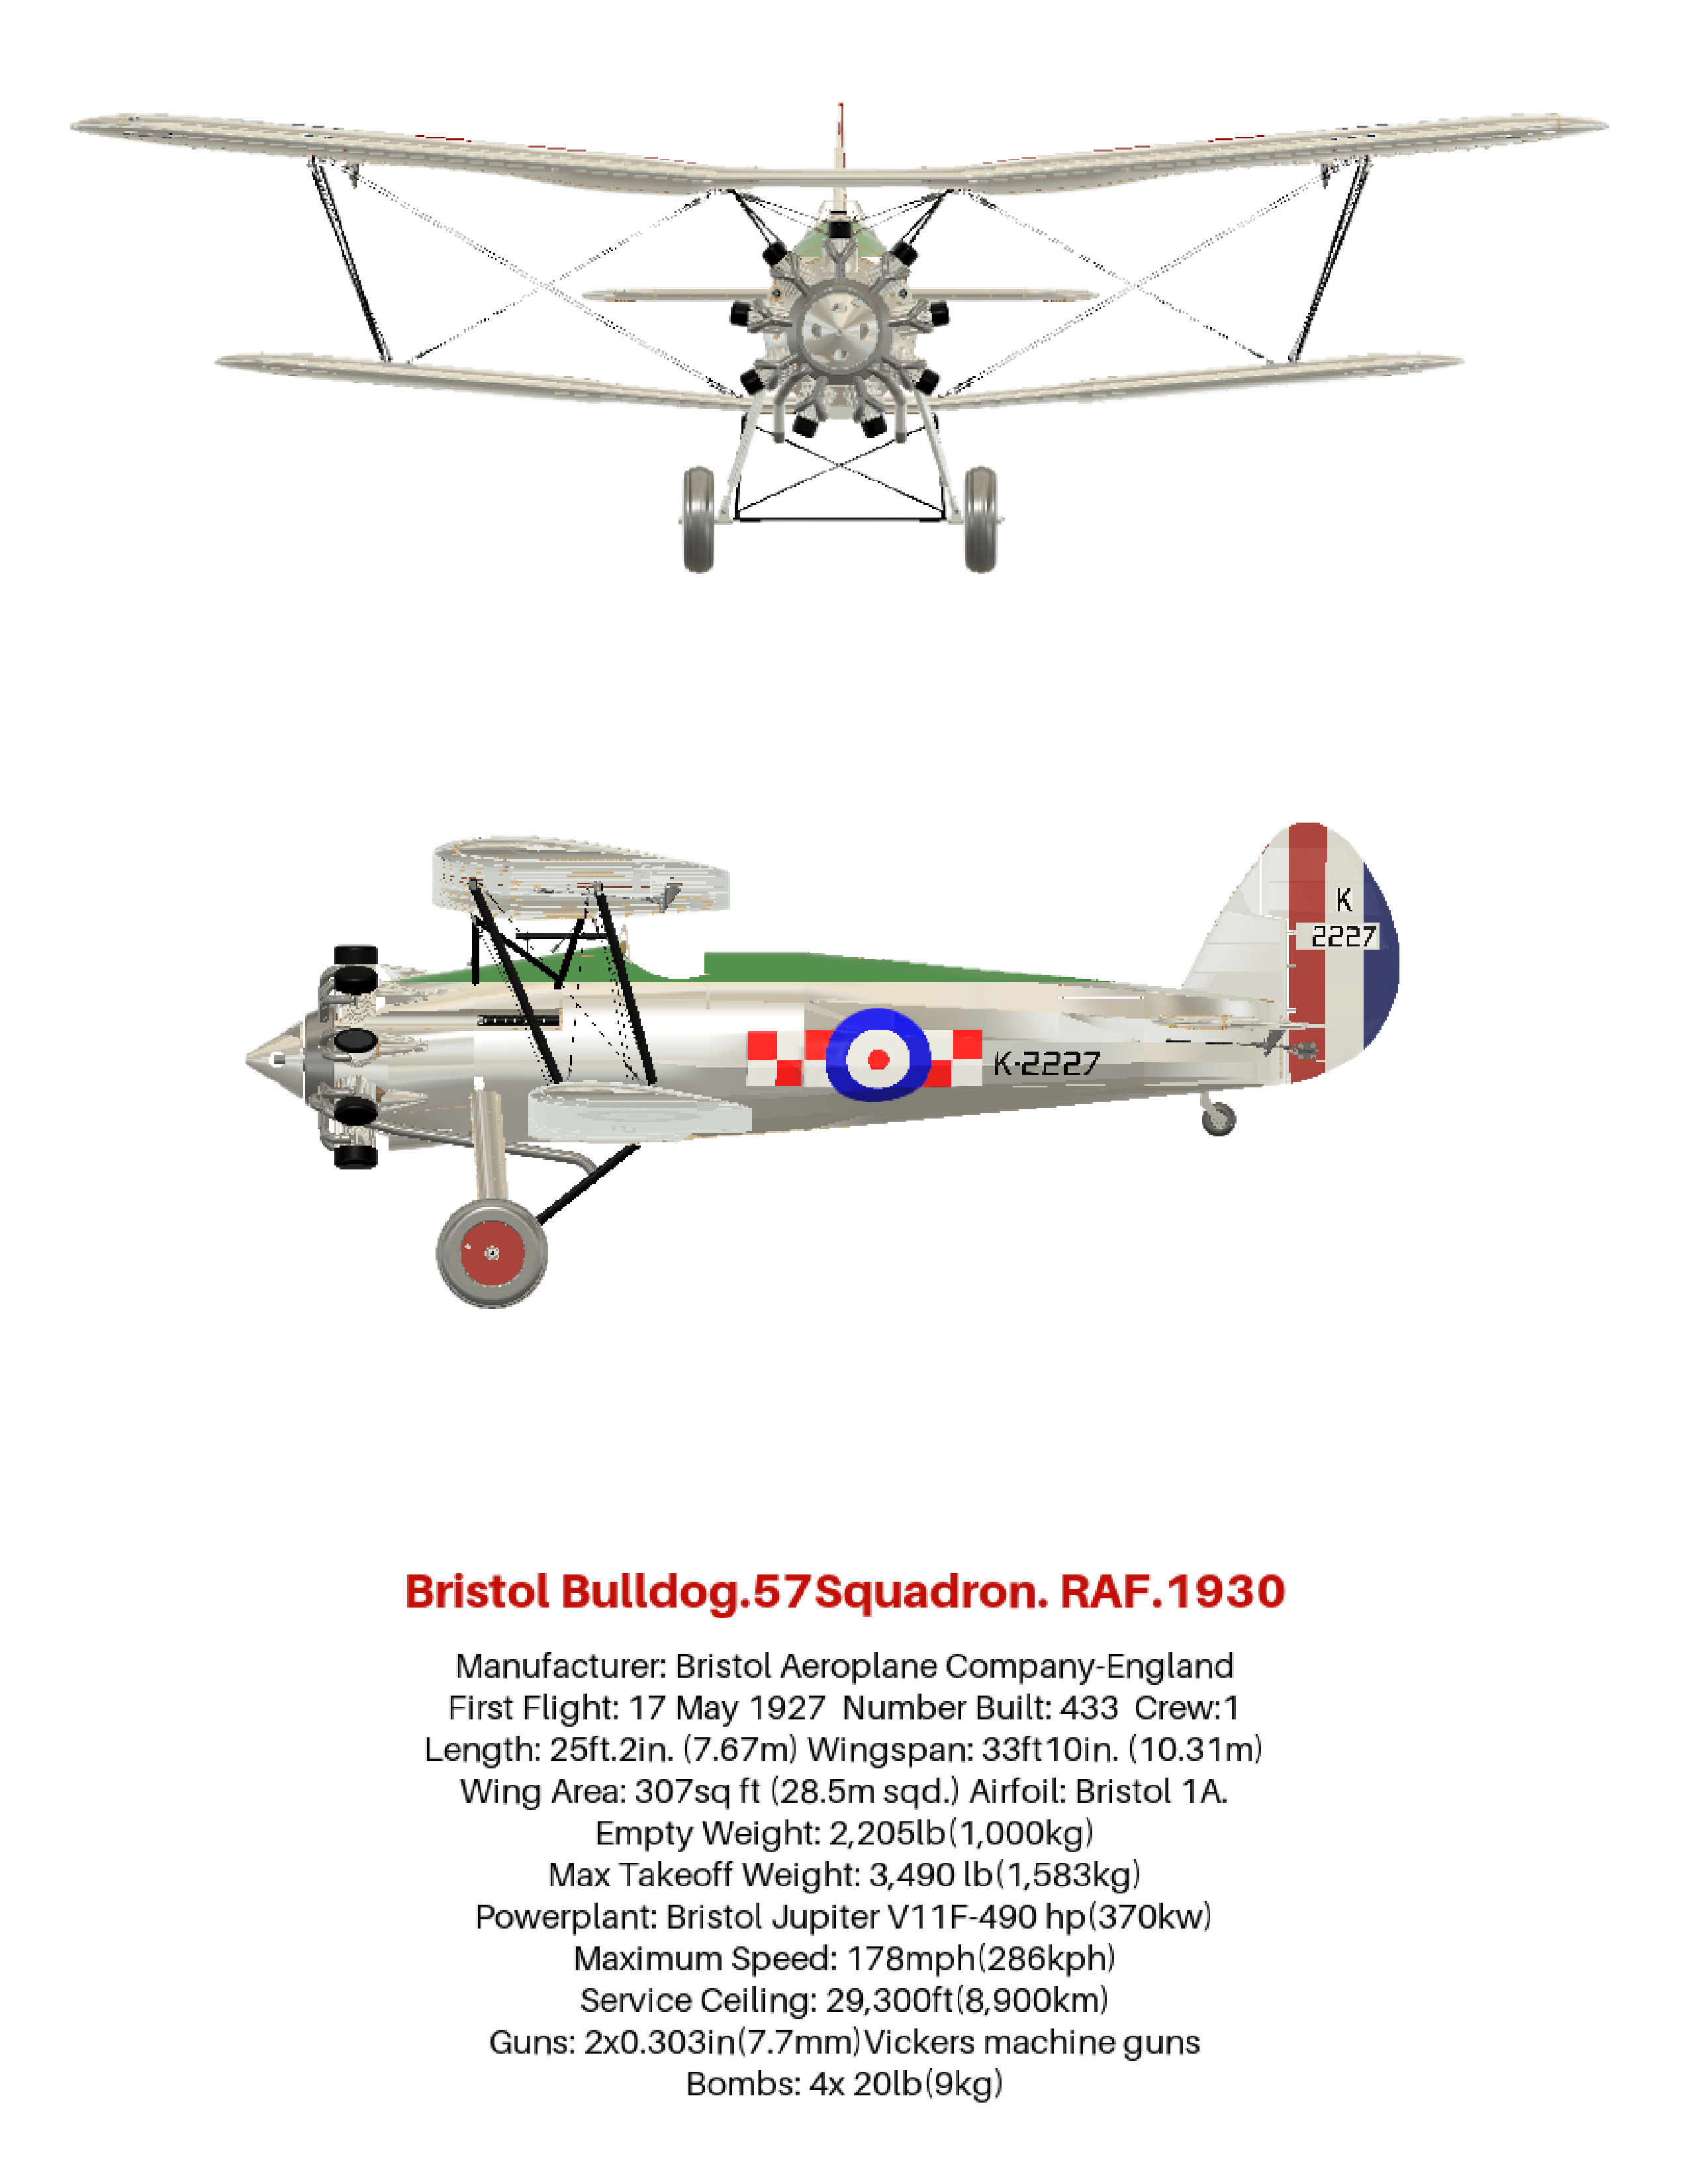 How the aviation art, of the Bristol Bulldog vintage biplane, was produced, using 3D software. Included are photos and links to many aviation gifts, from Zazzle
 -
Aviation gifts For All Airplane Lovers
Apr 20, 23 11:12 AM
 Aviation gifts for every occasion. Give your airplane fanatic friends and relatives the present they will really appreciate! Can be customized to make it truly unique.
 -
RC Retractable Landing Gear: The JP Hobby ER-005 Metal Strut Set.
Dec 19, 22 01:55 PM
 Full details of RC retractable landing gear. For models up to 6 Kg (13.2 lbs). Steerable nose wheel and sequencer for gear doors and brakes. For grass strips.
 -
FLEX RV-8 70CC FLS:ARF and ARFSV.
Nov 02, 22 02:45 PM
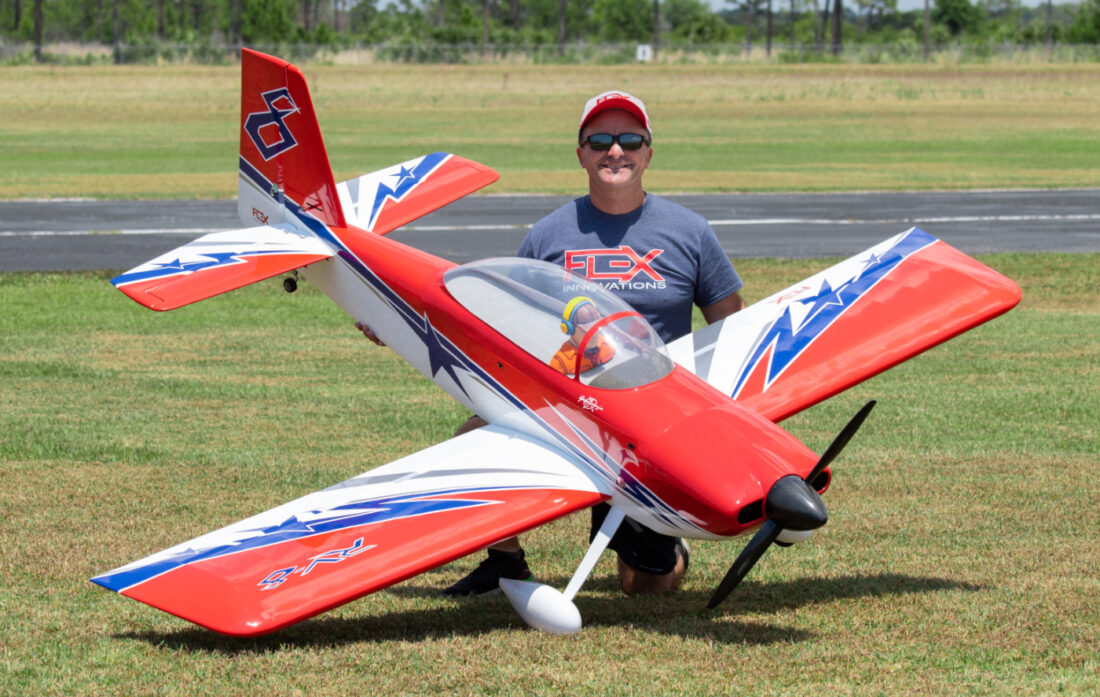 The Flex RV-8 70cc, 35% Scale, 3D RC Airplane. Super lightweight and gas or electric power. Very complete and fast assembly.
New! Comments
Have your say about what you just read! Leave me a comment in the box below.