The 2016 Aspire RC Sound System
This RC sound unit use's no speakers and features today's technology to give the most accurate and loudest sounds possible! Light and small for your RC airplane!
Please note that MR RC Sound units are no longer available!
The Aspire has been introduced by MRRCSound. This is the third iteration of RC sound units designed and built by Andrew Lawrence, in the USA.
Sound units by the hundreds have been shipped all over the World for the last 4 or 5 years and electric RC fans have been delighted with the realistic sounds generated.
When you fire up your latest creation, in the pits, the reaction from other flyers can be very dramatic! I know because I speak from experience of being surrounded by flyers with all kinds of questions about this superior RC sound system.
The Aspire produces true scale sound from start-up, through idle and up to full throttle. I love it when I taxi back to the pits, after a good flight and reduce the throttle to the stop position and hear the "engine" spit and pop to a standstill!
Table of Contents
What's Included ~ Features ~ Specifications ~ Extras Required ~ Mounting ~ Installation ~ Mounting TT-25 ~ Switch ~ Video ~ Compare to V4.1 ~ Order Info
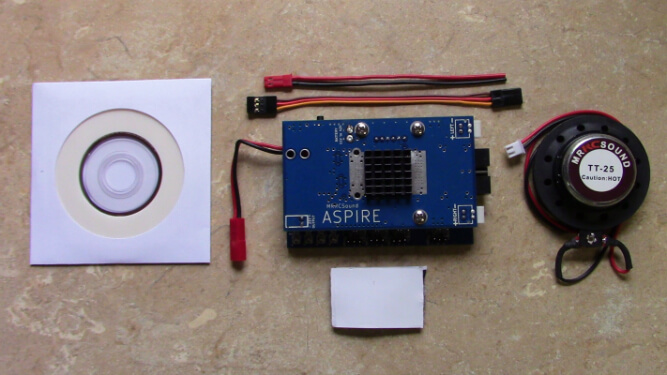
What's Included in the Aspire RC sound unit

- CD of the manuals and instructions
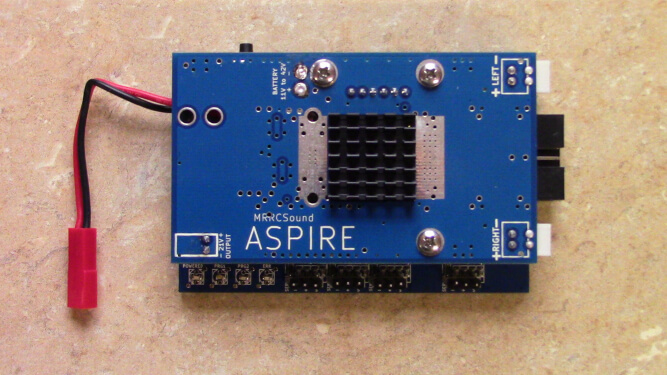
- The Aspire unit
- Velcro tape for mounting the Aspire
- TT-25 transducer
- Male/male servo lead for the throttle connection
- JST lead for making your own power connector
Please notice that there is no speaker! The TT-25 transducer, when properly mounted, makes the airplane into a speaker. No sound outlet holes are required.
Features Return to Contents
- Unit comes with 8 different engine sounds-Lycoming,Merlin, Continental, Double Wasp, Wright Cyclone,Daimler Benz 605, Wasp Jr.,and Jet turbine.
- New sound creation methods to produce realistic sounds
- A high end processor is used, giving faster computations of the sound and better response time.
- A powerful amplifier is incorporated, with lots of spare capacity, for long life and space for future enhancements.
- Dual board design (One mounted on top of the other) The bottom board is the sound processing unit and the upper board is the power and amplifier section.
- All components are sandwiched between the boards, giving good crash protection.
- The sound memory is stored on a Micro SD memory card
- Micro SD memory card(More sound files and higher quality sound)
- Randomly selected start/shut down sequences-15 different start-ups and 10 shut downs.
- Random chatter for military or civil aircraft (selected via transmitter switch and auxiliary channel)
- Whistle can be automatic or transmitter selected. Automatic is initiated from a built in accelerometer that detects a pull out from a dive. Characteristic of the P-51 and F4-U.
- Guns, bombs etc., can be initiated from an aux. channel and transmitter switch.
Specifications Return to Contents
- Size-2" x 3.25" x 1"
- Weight of module-2.2 oz.
- Weight of complete installation-Approx. 6 oz with one TT-25
- Power Input- Use existing Lipo- 3S to 10S.
- Power draw-2.5A with 2 TT-25 transducers
- Sound level- approximately 110mb
- Sound quality-16 bit 44K CD
- TT-25 Transducer-2" diameter x 3/4" high. Approx. weight-3 oz.
Extra Parts Required Return to Contents
- Power connector, to suit your lipo battery.
- Standard radio y-connector for throttle control and connection to Aspire
You can build your own power connector, to suit the battery connections you use. Obviously you must be able to solder well, but for those of us who are not so hot at soldering or just plain lazy, you can buy adapters for the most popular types.
 |
If you use the popular T-connector ( Also known as "Deans"), simply plug the battery into the left side of this pass through and connect the male side to the ESC lead. Connect the male JST connector to the Mr RC sound unit. Price of the T connector to JST male- $6.99US plus shipping cost |
Safe and secure shopping with PayPal
|
Use this connector if your system is using the XT60 connectors.(All the Horizon and E-Flight models) Simply disconnect the battery from the ESC and plug the battery into one side and the ESC lead into the other. The JST male end goes directly to the the sound card. Price of the XT60 to JST male connector- $6.99US plus shipping cost |
 |
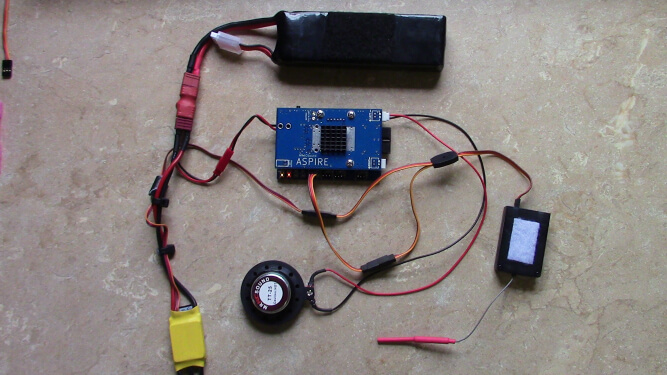
Mounting The RC sound unit in the Model Return to Contents

- Aspire module*
- TT-25 transducer*
- Existing receiver
- Throttle "Y" harness
- Existing Lipo battery
- Power "Y"connector ( To suit the connector on the battery)
- JST connector to the Aspire unit*
- Existing ESC
Note that parts supplied are marked with a " *"
Installing the Aspire module Return to Contents
Treat this just as if it were a receiver. You can use the included velcro tape or a velcro strap, mounting to the model, with a piece of foam rubber sandwiched beneath the unit.
Double sided foam tape can also be useful.
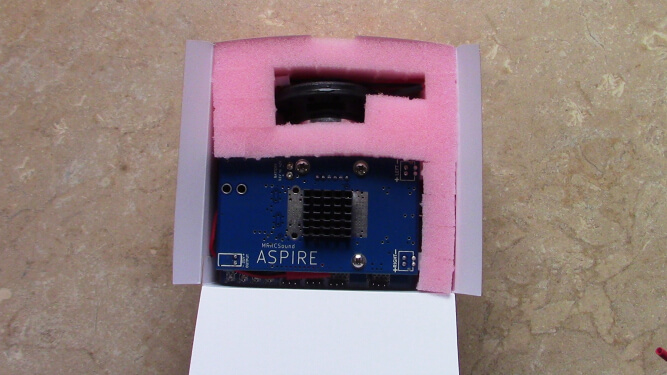
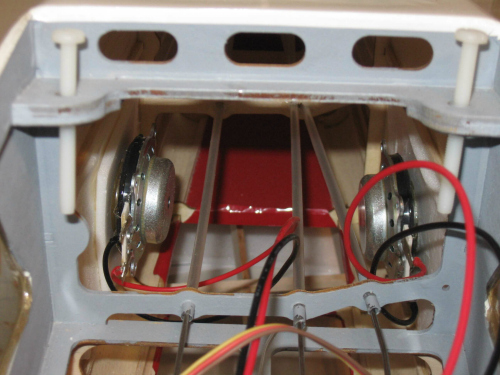
Mounting the TT-25 Transducer Return to Contents
If you are using a foam model, Then the transducer can be mounted direct to the inside of the fuselage.
In my Freewing Mosquito, the fuselage sides are curved, so I epoxied a piece of foam, curved on one side (by sanding) and flat on the other. This gave a flat surface for mounting the TT-25.
I prefer to remove the self adhesive that is on the mounting surface and use 5 minute epoxy to glue the transducer to the foam.
For conventional construction (Balsa and ply) I have used a piece of 1/8" thick foam (Purchased from the Dollar Store) and glued this rectangle to the inside of the covering and then the TT-25 to this. This has worked well on my E-Flite Beaver.
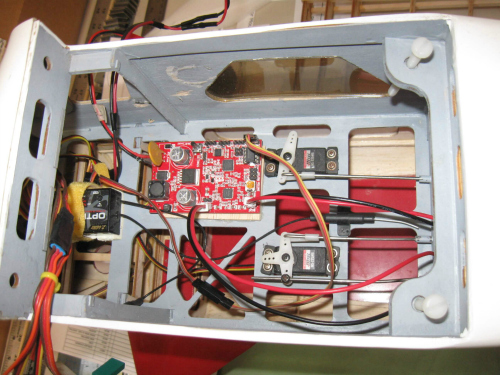
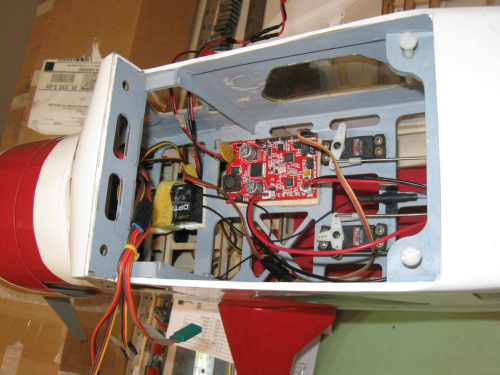
Please note that in the photos below, the sound module is the earlier V4.1 The Aspire can be mounted in the same way.
If you want to stop the "sliding" and look at a photo longer, just click on the image.


Switch or not? Return to Contents
For the older V4.1 RC sound unit, It is necessary to power up the receiver first and then the RC sound unit. This is required because the sound module needs to know where low throttle position is. Make sure your transmitter throttle stick is at the lowest point, along with the throttle trim, before turning it on.
The Aspire RC sound unit does not really need this receiver sequence, but it is recommended.
All of this means that a switch could be used, in the unit power line, or the JST connector must be accessible.
So the start-up sequence should be-
- Ensure that the transmitter throttle position is at its lowest point, along with the throttle trim.
- Plug-in the Lipo battery.
- Plug in or switch on the sound module
I like to set up my system, so that as soon as I start to taxi, I advance the throttle trim fully. When the flight is over and I am returning to the pits, I can stop forward movement of the RC airplane and then reduce the throttle trim. The sound module then goes into the shut-down sequence. Very realistic!
When working on the bench, setting this up, do remove the prop, for safeties sake!

I have used a switch on my 1/4 scale cub, in fact if you look at the photo, you will see 2 switches. I use a separate battery for the radio system,(No BEC on the 100A ESC) so I switch on the radio system first and then the RC sound system.
Video Return to Contents
Andrew (The designer and builder) has just completed this video and he shows all the features of the Aspire RC sound unit. It is quite a long video but well worth a look.
Aspire compared to V4.1 Return to Contents
The V4.1 is the unit previously offered. It is still available at a much reduced price! Click here for more details.
The V4.1 is an excellent unit and I own 3 of them myself and they have given me excellent service and very realistic airplane sound effects.


- More powerful amplifier.
- Sandwich construction protects components
- IOS lipo can now be used (8S is max with V4.1)
- Higher end processor
- Much improved sound quality
- Random start/shutdown sequences add even more realism and authenticity
Alternate Sound Packs for Aspire Unit
Please note that these modules must be exchanged with the PCB chip in the Aspire module. These are NOT complete sound units!
Hover your mouse over the images below to see the sounds available per module.
, Me-262, Mig-15, Mig-21, and SU-27.") Aspire JetsAspire Multi EngineAspire WW2Aspire WW1
Aspire JetsAspire Multi EngineAspire WW2Aspire WW1Ordering Information Return to Contents
- The RC aircraft sound units are hand made by Mr RC Sound Systems, in the USA by the inventor Andrew Lawrence.
- RC Airplanes Simplified is a reseller of these RC sound systems and any questions regarding the units or for shipping details Contact us
- If you order through this site, you will receive an e-mail order receipt from PayPal.
- Shipping is by the USPS and is a flat rate of $7.95USD. This rate applies to the USA
- The Mr RC aircraft sound modules are recommended to be used with 2.4GHz radios only!
- Please note that you DO NOT need a PayPal account. You can pay for your RC aircraft sound unit with your credit card via PayPal. Just click the "Add to Cart" button.
- The details below are taken directly from MRRCSound site-
Please note that MR RC Sound units are no longer available!

Get Gloster Gladiator Profile eBook Free

Don't worry your e-mail address is totally secure.


Recent Articles
-
The Bristol Bulldog vintage biplane, of the RAF, in 1930
May 22, 23 10:47 AM
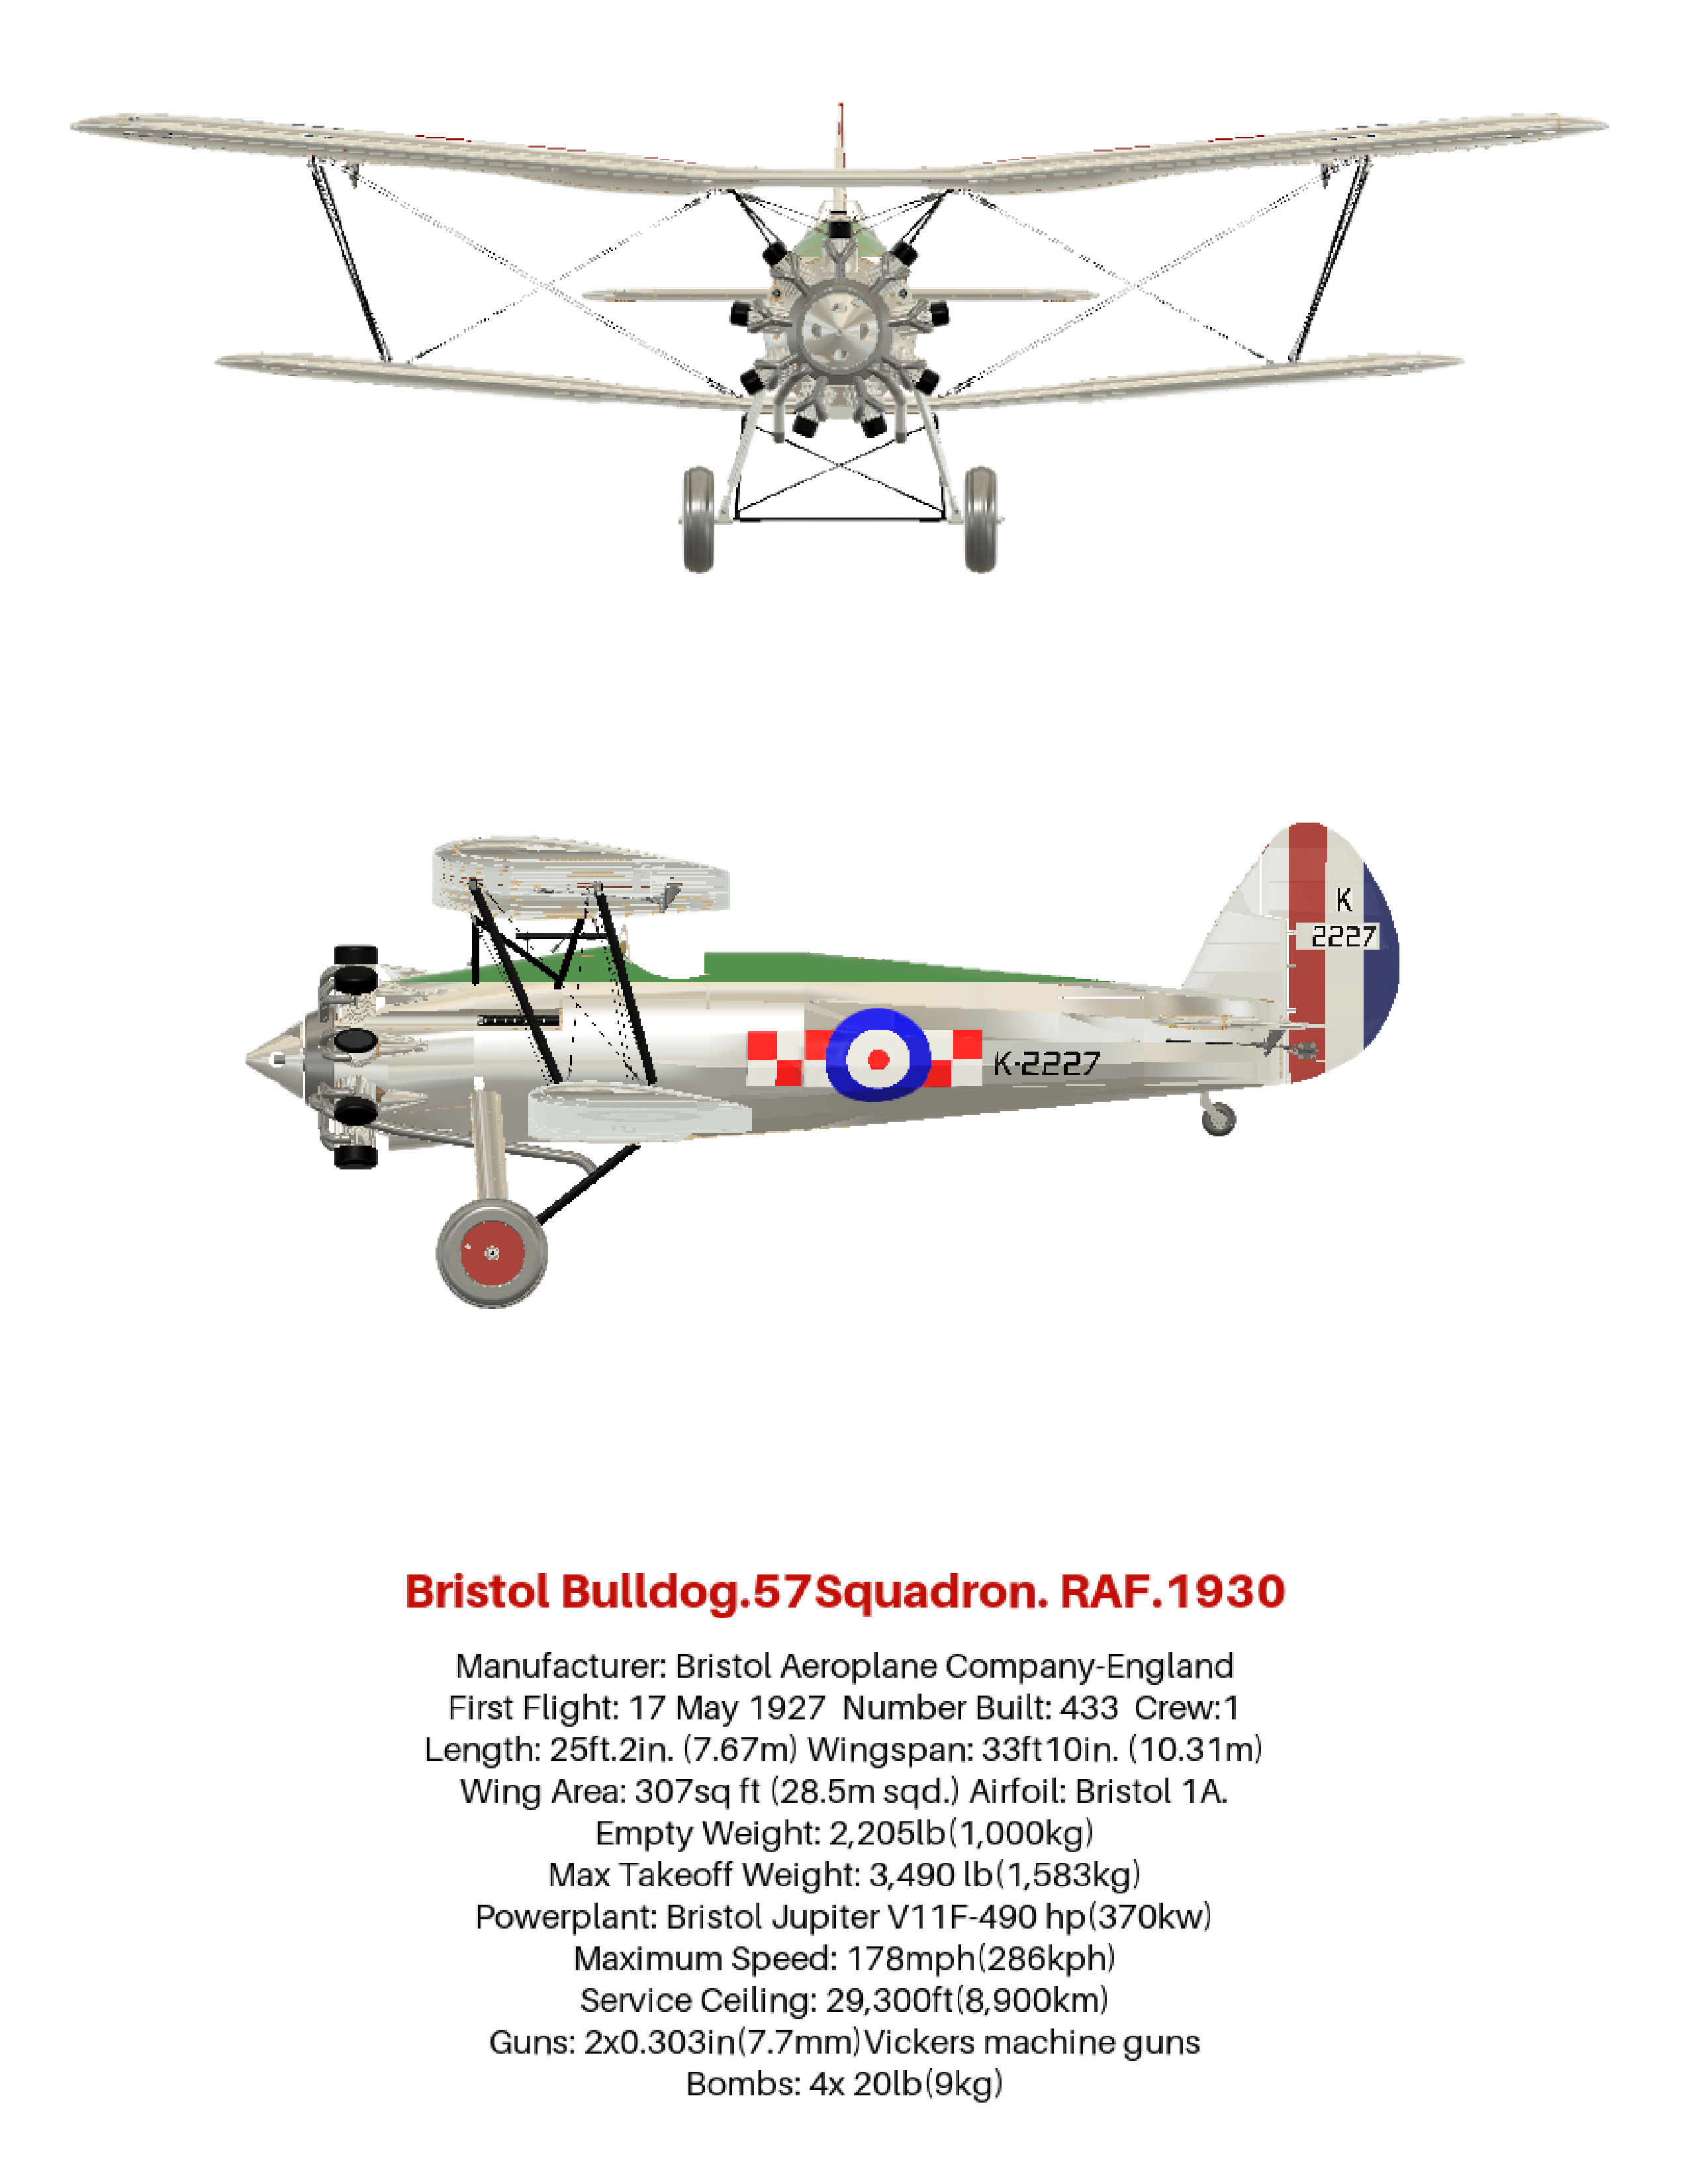 How the aviation art, of the Bristol Bulldog vintage biplane, was produced, using 3D software. Included are photos and links to many aviation gifts, from Zazzle
 -
Aviation gifts For All Airplane Lovers
Apr 20, 23 11:12 AM
 Aviation gifts for every occasion. Give your airplane fanatic friends and relatives the present they will really appreciate! Can be customized to make it truly unique.
 -
RC Retractable Landing Gear: The JP Hobby ER-005 Metal Strut Set.
Dec 19, 22 01:55 PM
 Full details of RC retractable landing gear. For models up to 6 Kg (13.2 lbs). Steerable nose wheel and sequencer for gear doors and brakes. For grass strips.
 -
FLEX RV-8 70CC FLS:ARF and ARFSV.
Nov 02, 22 02:45 PM
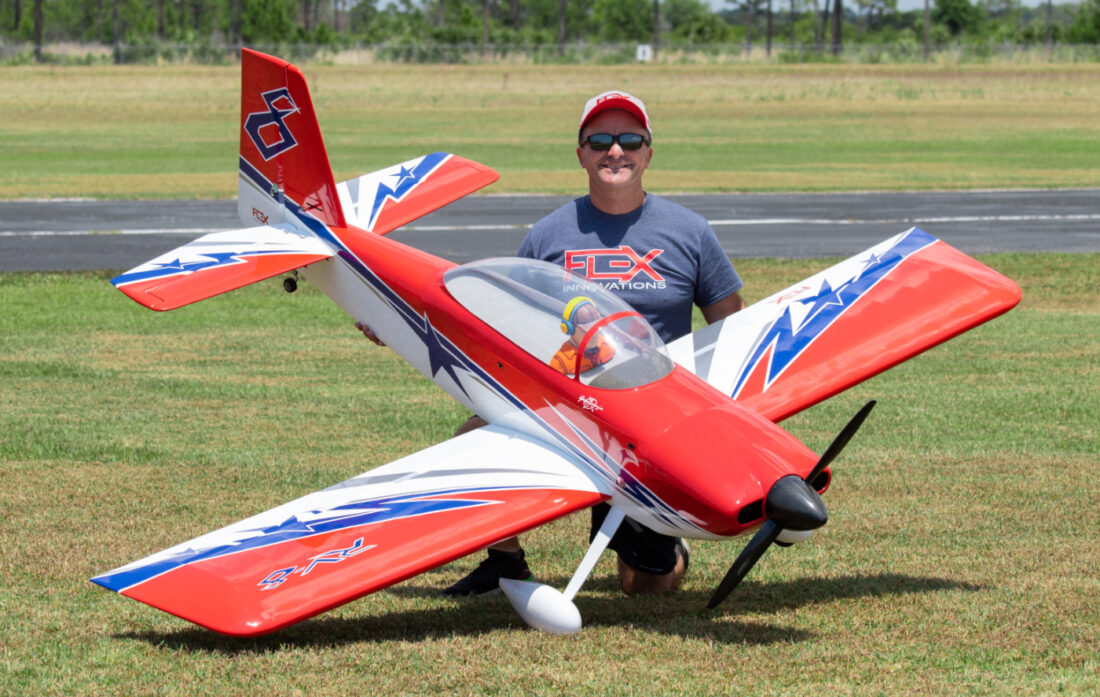 The Flex RV-8 70cc, 35% Scale, 3D RC Airplane. Super lightweight and gas or electric power. Very complete and fast assembly.