A radial RC cowl that can be built quickly and easily
Build an RC cowl, that looks as good as a fiberglass unit and can be split for maximum access and retained by super strong rare earth magnets.

If you need a radial RC cowl and a fiberglass version is not
available you could mold your own. This is a long process for a one-off and
not all of us has the required knowledge and experience. The method
explained here is quick and results in a light weight and strong cowl.
Step 1: Design of the RC cowl
The outside dimensions and shape of your cowl need to be determined.
Some cowls are a straight cylinder, others have a curved outside
diameter and some have blisters to accommodate valve covers etc. The
example we are using here is for a 1/5 scale Gloster Gladiator.

You will notice that for this RC cowl I have shown an optional split plate. As my model will be electric powered I like the idea of splitting the cowl to give access to the lipo batteries for changing purposes. I will give more details later of this option.
Your design can be less complicated than mine and can just be a free hand sketch. If you have problems with designing contact us and I will try and help you.
The nose ring parts (A6, A7 and A8) are
laminations of 1/4" thick balsa. These parts were laser cut and if
conventional cutting is used they could be made from 1/2" thick stock.
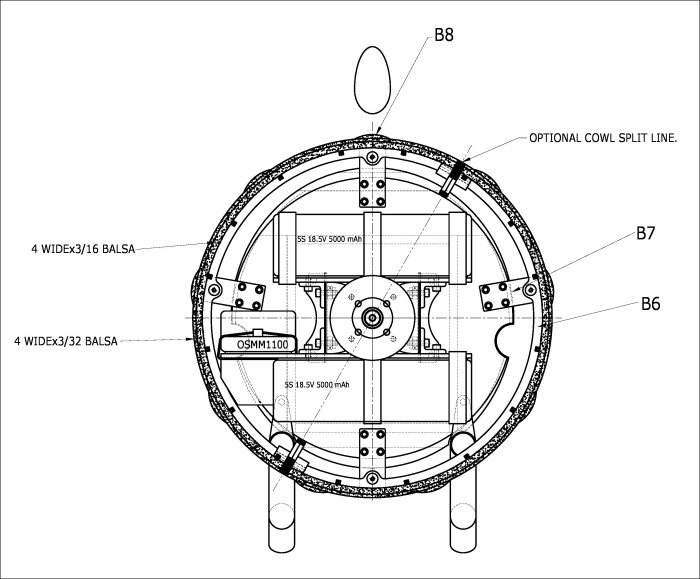
This drawing shows the front view of the Gladiator RC cowl. Note that because I opted for the split cowl the two B7 support pieces were moved to the fixed portion of the cowl.
Step 2: Frame construction

The ply cowl ring is assembled first, from 3 segments, over the plans. Notice the use of magnets to hold parts together. I then used CA on the joints and a squirt of accelerator. I have been using magnets for years and would not consider going back to the old way. It is simple and quick to fashion special fixtures for a lot of things. Great Planes used to sell a system but alas it is no longer available.
These links may interest you if you would like more information-
- Click here to visit Airfield Models for lots of ideas on magnetic building
- Visit this site and see details of the latch magnets used
- Use this link to visit the page on Amazon that shows the magnets
I bought the steel sheet from the local Lowes store. It is 4ft. x 2 ft x 0.032" thick and has some kind of plating, that prevents corrosion.

Assemble the front, balsa rings, then make a cross as shown here. I used
3/16" thick balsa. This cross is used as a temporary internal brace that
is removed when the construction is complete. Use whichever thickness is
appropriate for the size of RC cowl you are making.


This photo shows the stringers glued in position (1/8" square spruce) and
the top formers. Note that the cross is glued to top and bottom formers.
The old field box battery and the miniature anvil are used to weigh
everything down. Check for squareness to the work surface.
Step 3: Basic cowl

The basic sheeting has been applied . I used 4" wide x 3/16" balsa.(
Note the grain direction). A squirt of Windex on the outside surface
made it easier to form around.

Note that the cross is tack glued into position and as well as
supporting the structure it makes a useful hand hold!

Here we can see the outer layer of 3/32" thick balsa has been applied
and the upper rings have been glued in position. This completes the
basic structure of this RC cowl. All that remains is a lot of sanding to
create the curved outer surface.

Here it is. I did make a profile template to help in forming the double ellipse shape on the outside surface. Now the internal cross piece can be removed.
The 9 blisters need to be added and of course the cowl has to be finished. I will be covering it with 1/2 oz. fiberglass cloth and resin and then painting it to suit the colour scheme of the Gladiator.
Now I will have no problem in building a model that does not have a
fiberglass cowl available. This process could also be used to make oval
shaped cowls like the P-47 Thunderbolt. It is simple and quick and
light!
Magnetic split cowl
The RC cowl shown here is for a 1/5 scale Gloster Gladiator that is electric powered. I want to mount the large lipo batteries (2x 5S) inside the cowl to help balance the model. These will obviously need to be replaced frequently so a quick access system was called for.
A 180 degree split would give ample room to remove the batteries and I was intrigued by the possibility of using rare earth magnets to retain the cowl halves. If the magnet idea worked there would be no need to use small screws that always seem to get lost in the tall grass!
After some internet research, it looked as if a 1/2" diameter x 1/8" neodymium magnet would work. These little suckers can give a pull of 6 to 9 lbs each! If I used 4 such magnets then the total force holding the cowl together would be 24 to 36 lbs.
It took me a few days to decide whether to go ahead with the idea. The thought of razor sawing into my new cowl was challenging!
However I went ahead and am now really glad I did.

This photo shows the removable part of the RC cowl. 1/8" thick ply plates have been added and the magnets have been glued in position.
Use epoxy for this and the magnets should stay in position for ever. A scrap of balsa was used on the back side of the 1/2" diameter holes. Note that the holes were drilled through the stack of 4 ply plates, on a drill press, to ensure alignment.
A nice feature of the magnets is that they self-center and alignment pins were not required to ensure cowl halves lined up perfectly.
You will have to be careful with the magnets before installation. They are very strong and can cause finger pinching! When in a stack they are very difficult to part and much sputtering and maybe swearing can be heard when trying to separate!
Before installing and gluing in position, check the polarity of the
magnets. We want to hold the cowl together-not make it fly apart!

Here we can see the fixed half of the cowl. I have moved two of the cowl
retaining plates to the fixed side , for rigidity and stability.

Now we see the RC cowl completed apart from final finishing. It does take quite an effort to part the cowl and I am sure it will not part in the air (Famous last words?!)
For future projects I will build in the ply magnet holding plates and thus avoid the need to cut the cowl after completion. Those ply plates can also act as hard sanding guides when forming the outside shape of the cowl.
I purchased the magnets from a local industrial supply house. You could
find a similar place by internet searching for "Rare earth magnets"

Get Gloster Gladiator Profile eBook Free

Don't worry your e-mail address is totally secure.


Recent Articles
-
The Bristol Bulldog vintage biplane, of the RAF, in 1930
May 22, 23 10:47 AM
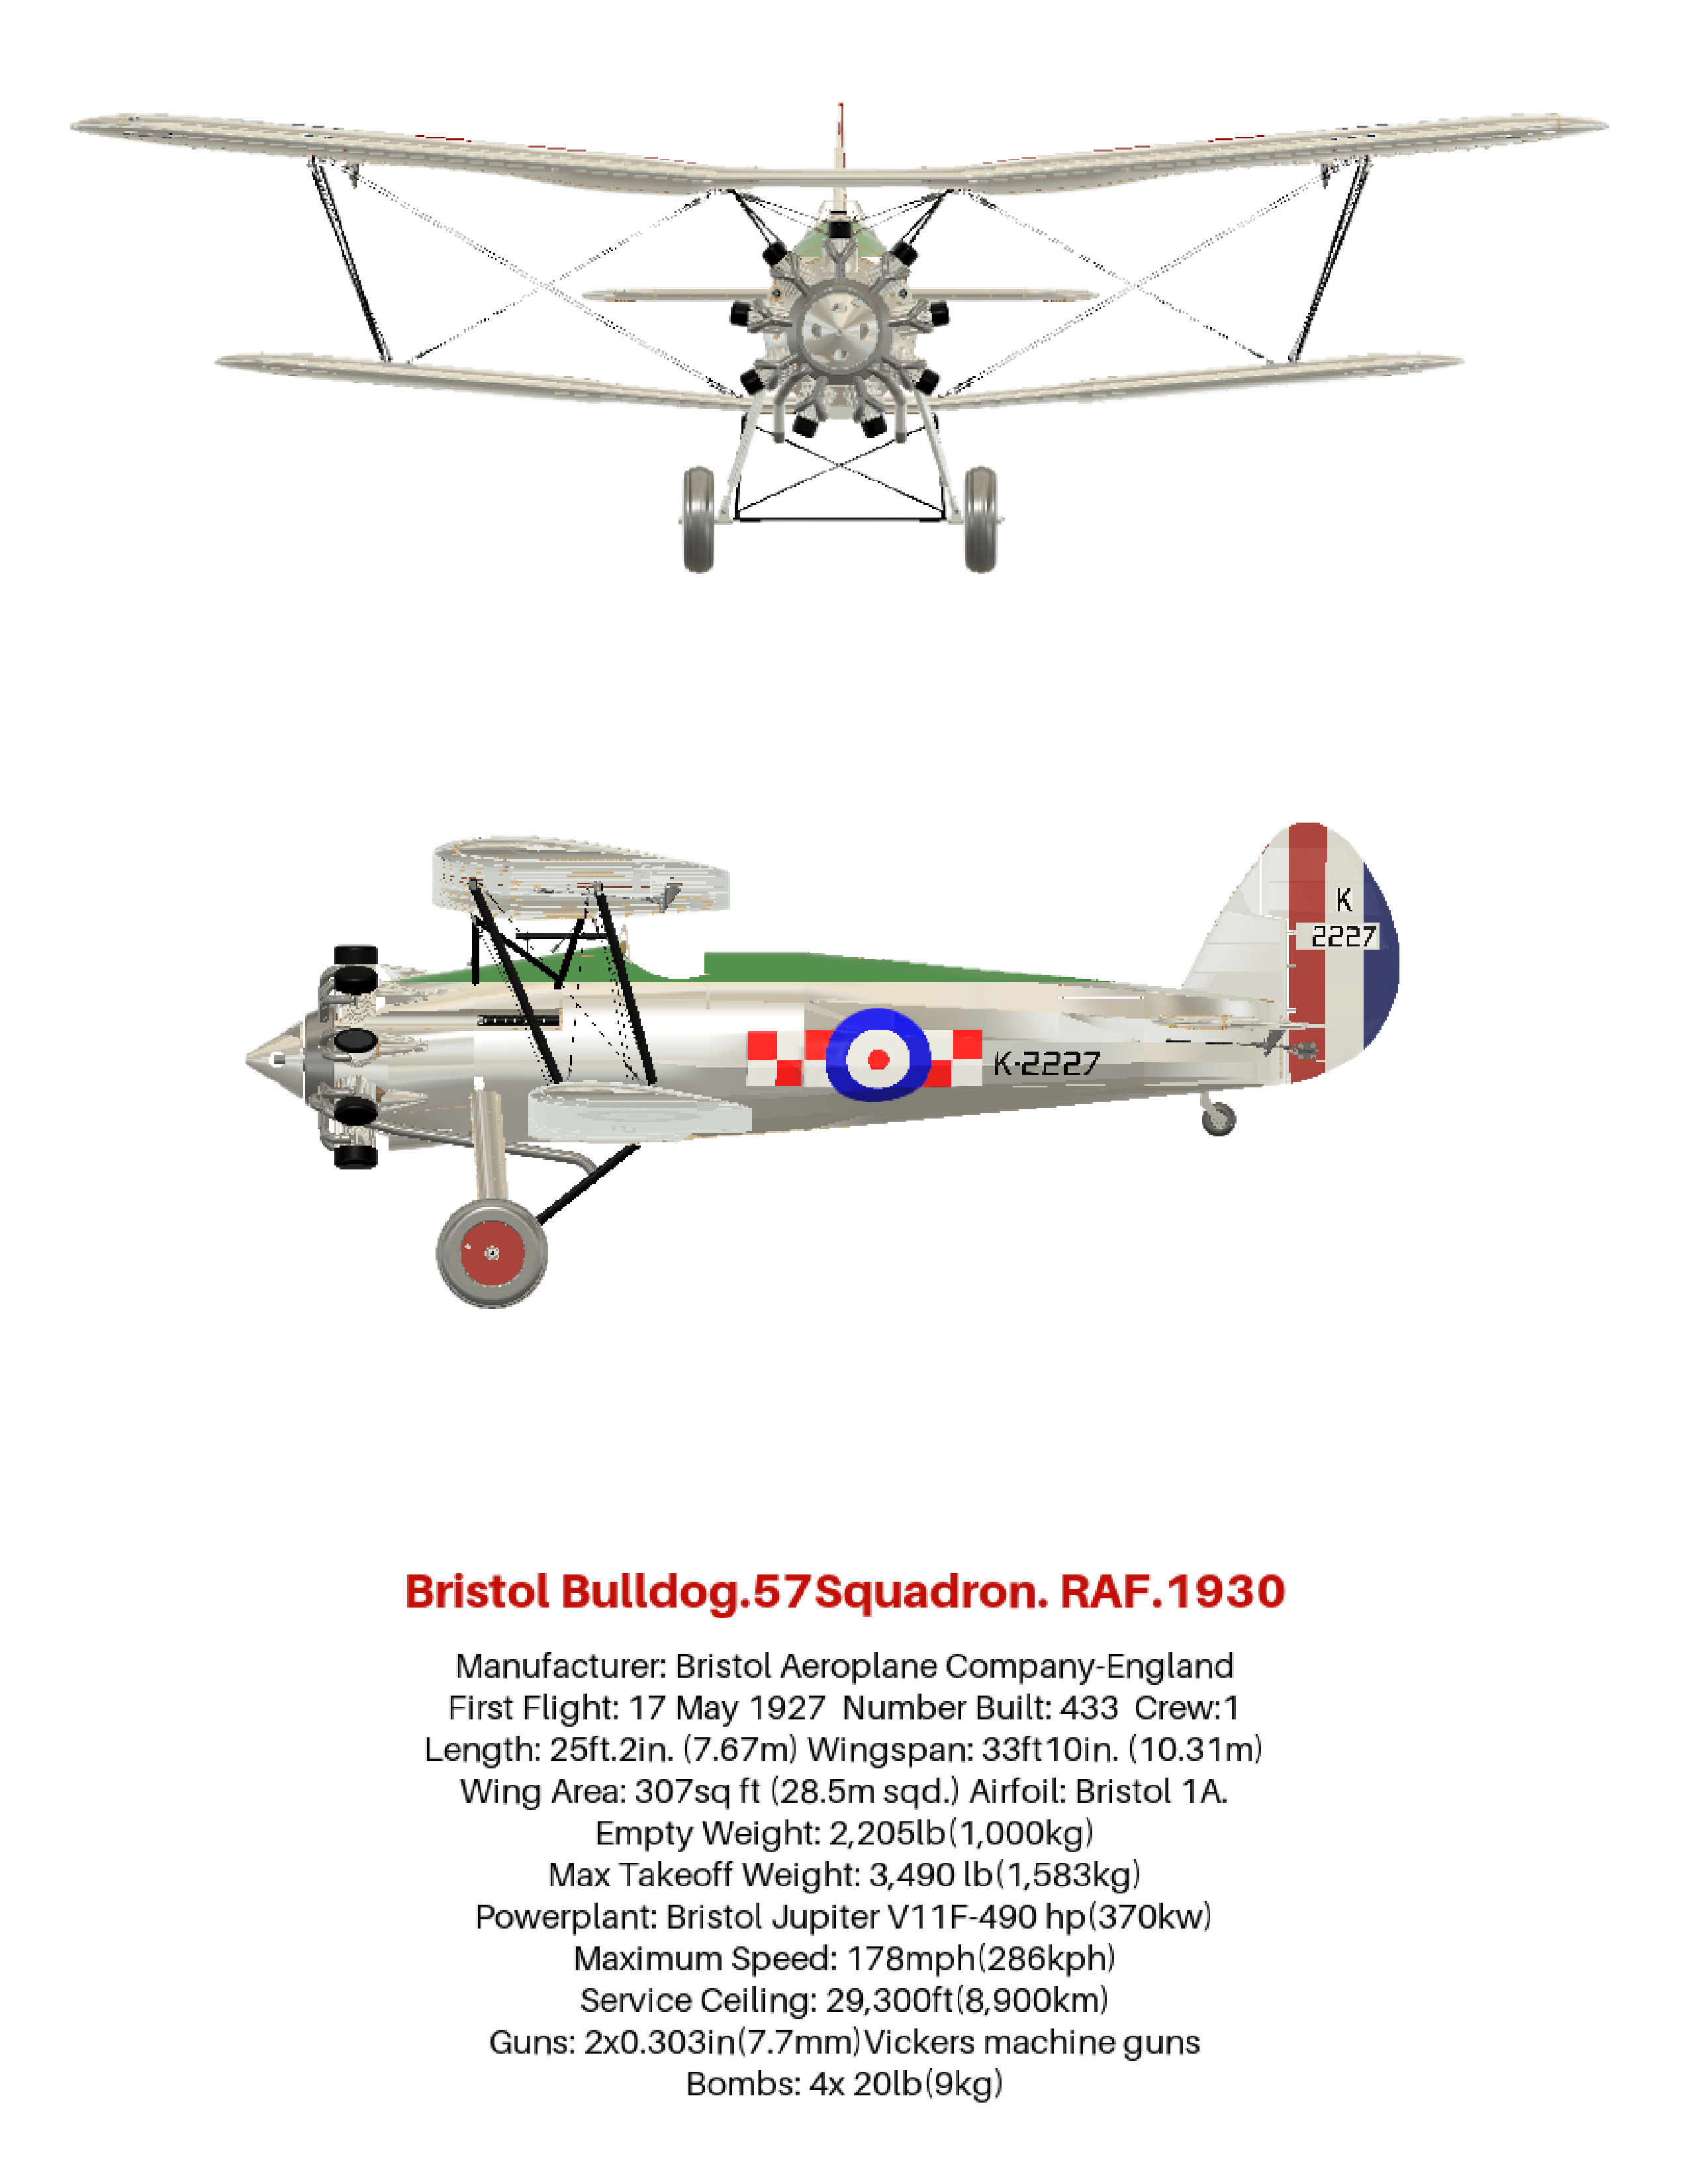 How the aviation art, of the Bristol Bulldog vintage biplane, was produced, using 3D software. Included are photos and links to many aviation gifts, from Zazzle
 -
Aviation gifts For All Airplane Lovers
Apr 20, 23 11:12 AM
 Aviation gifts for every occasion. Give your airplane fanatic friends and relatives the present they will really appreciate! Can be customized to make it truly unique.
 -
RC Retractable Landing Gear: The JP Hobby ER-005 Metal Strut Set.
Dec 19, 22 01:55 PM
 Full details of RC retractable landing gear. For models up to 6 Kg (13.2 lbs). Steerable nose wheel and sequencer for gear doors and brakes. For grass strips.
 -
FLEX RV-8 70CC FLS:ARF and ARFSV.
Nov 02, 22 02:45 PM
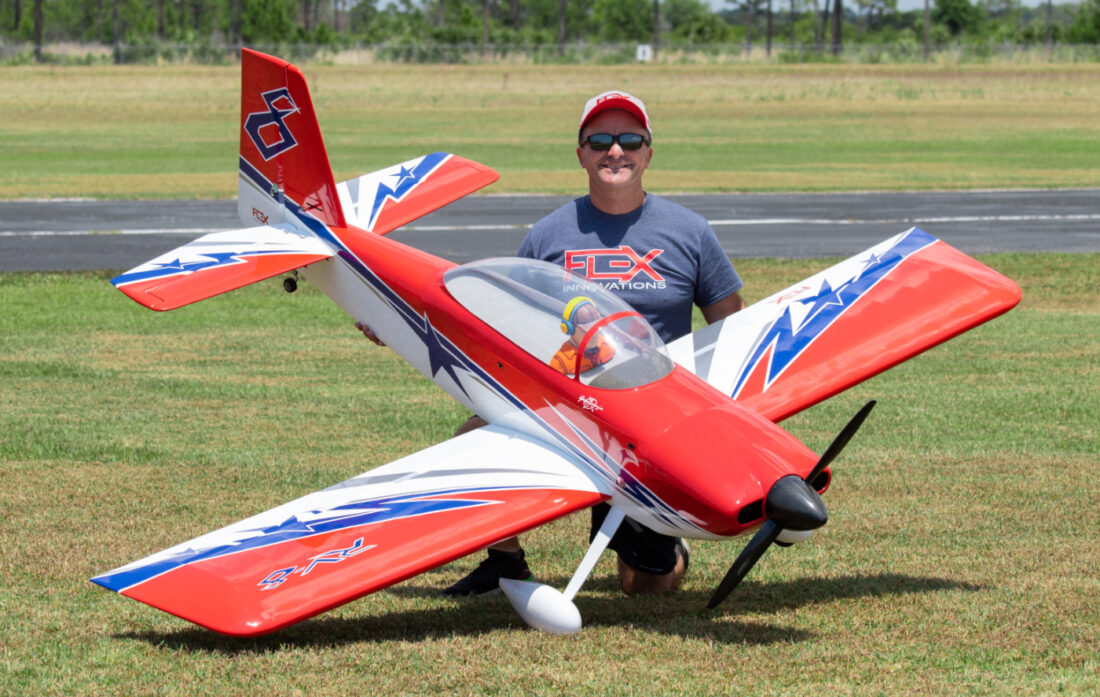 The Flex RV-8 70cc, 35% Scale, 3D RC Airplane. Super lightweight and gas or electric power. Very complete and fast assembly.
New! Comments
Have your say about what you just read! Leave me a comment in the box below.