DETAIL FINISHING OF SCALE RC AIRPLANES
SCALE RC AIRPLANES CAN HAVE PANEL LINES, RIVETS AND RIB STITCHING-HOW TO ADD THEM TO YOUR MODEL.

Rib Stitching of scale RC airplanes
All fabric covered scale RC airplanes will benefit from the addition of this detail. Visit a local airport and take a close look at a full size, fabric covered airplane. You will notice that the fabric is actually stitched to each rib, on all flying surfaces. The fuselage generally does not have the stitches.
So how can we reproduce this effect? I know of two methods. The first uses white glue to simulate the stitching cord. This can be applied to each rib, using a 50/50 white glue and water mix. A small glue bottle (or a hypodermic needle) can be utilized, along with a straight edge. Before you apply to the surface of your newly covered RC airplane, practice on scrap material, until you are confident of the process. The stitches should be as wide as a rib and spaced at a scale distance. Please note that any mistakes can be wiped of with a damp rag or paper towel, before the glue dries!
A modification of this method is to apply the glue to a sheet of the covering material used to cover the model. When the glue is completely dry, the material is cut into strips as wide as the ribs. These strips can then be ironed on to each rib position. This method does speed up the process somewhat.
If you are thinking that the above processes are time consuming, then you are correct! But do not despair! I have a solution for you. A gentleman by the name of Ken Kosmenko has come to our rescue! Ken has a business in British Columbia, Canada that manufactures a Scale Rib Stitch tape.

The photo at left is taken from Ken's website and shows his tape applied to a wing. The tape is supplied in 2 inch wide strips and you cut it to the width required. The strip can then be applied to the wing rib and being self adhesive, this completes the process! Needless to say this has to be the quickest and simplest method to apply rib stitches to scale RC airplanes!
I have used Ken's tape on my last two scale RC airplanes and can really recommend his tape and excellent customer service.
I believe it was Ken who advised me that the spacing of the stitches is generally 2 inches on the full size aircraft and 3 inches on aircraft built prior to the late 1920's. On ribs within the blast area of the propeller, the spacing is 1 inch. The tape is available in a wide range of scale sizes.
Rib Tapes
Rib tapes are applied over the rib stitching and generally are 2 inches wide on the full size airplane. The edges of the tape is usually "pinked" to prevent the edges the edges from fraying. Reproducing this "pinked" edge has been a challenge for builders of scale RC airplanes for quite a while.

This shows a full scale reproduction of a WW1 de Havilland DH-2.
I have searched high and low for a pair of pinking shears and have tried the serrated cutting edges of many rolled kitchen products. All without success! Dynamic Balsa are now offering tape made from solartex, in many scales. Just iron on! Give this product a try-you will not be disappointed!
It should be mentioned that many early aircraft had rib tapes that were straight and not pinked. Many WW1 aircraft had rib tapes that were "frayed". To reproduce this on your scale RC airplanes, "nick" the edge of the material with your hobby knife and rip the material along a straight edge. This gives a good simulation of the "frayed" edge.
As to when the pinked edge tapes started to be used-there are many opinions! All I can suggest is that you do your research and come to your own conclusions. I believe that all modern fabric covered aircraft use pinked edged tape and so do the control surfaces of many WW2 fighters. I THINK that pinked edges were first used in the early 1930's, but as I mentioned-do your checking on your particular subject.
These products make this aspect of finishing scale RC airplanes a lot simpler and are a pleasure to work with.
Aluminum Covering
Many scale RC airplanes require an aluminum finish of some kind. I do not think that painting an aluminum finish gives us a realistic finish. It is far better to apply aluminum and achieve a result that looks real. I have used a variety of types of material to achieve good results.
All the materials used must have a good surface prior to application. Consider the aluminum as a final coat of paint, so surface preparation must be as good as you can achieve. I prefer to use a light weight fiberglass cloth and epoxy resin finish, over the bare balsa.
Sand and fill the balsa prior to applying the glass cloth with a 50/50 mixture of finishing resin (Z-poxy or equivalent) and rubbing alcohol. When dry sand to a smooth finish and apply another couple of coats. Take your time and achieve the best finish you can-the final result will be no better than the preparation!
The next step is to mark the surface with the panel lines as per the scale 3-view drawings. Use flexible straight edges and curve templates (if required). I use a soft pencil for this operation but I have heard of using a fine tip marker.
Now we need to discuss the different materials that are available to achieve that super aluminum finish on our scale RC airplanes. If a polished aluminum finish is required then we can consider using Chrome Monokote or Chrome Ultracote. I have also had success using Coverite Presto Metallic Chrome film.

The final material to consider is a genuine aluminum material called Flite Metal. This material is 0.0015 inch thick, self adhesive aluminum sheet. It is applied, using the tools and techniques as explained on their website. Please click here for more details.
Many scale RC airplanes, finished with Flite Metal, have featured well in many of the top scale contests. It can reproduce a mirror finish or a dull aluminum look. For the ultimate realism this is probably the way to go.
I used this material on the Fairey Fantome and was very pleased with the results.

The photo above shows my 1/5 scale Fairey Fantome. A beautiful example of scale RC airplanes. The fuselage forward of the cockpit is covered with Flite Metal.
Before any covering was done, the forward fuselage area was finished with light weight fiberglass cloth and epoxy resin. The rear of the fuselage was then covered with silver fabric.
The Flite Metal was then applied, following the manufacturer's instructions. The results were outstanding!
The advantage that the plastic films have is that they are a mylar or polymer base, so they are quite hard and reasonably durable. However they do give you a highly polished surface that may not suit your application.
Application Procedure
Once you have decided the material you will use then the application procedure is fairly similar. The material is applied panel by panel, staring at the rear of the component and working forward.
The following procedure is basically for the film application, using a trim iron set on LOW and with the tip covered with a soft cloth to prevent scratching. If you are using Flite Metal then follow the instructions on the website.
Apply 3M Fine Line Tape (available at automotive paint dealers) to the outline of the first panel. Use 1/4inch and 1/8 inch wide tape. Ensure the tape is well pressed down.
Cut a panel about 1/2 inch larger all around and start applying the material in the center of the panel. Proceed towards the edges and prevent any bubbles from forming. Do not overstretch the material. When you reach the taped edges, iron the film down well.
Now using a sharp knife and a flexible straight edge trim the panel to the inside edge of the tape. Now remove the tape and there you have a finished panel. Overlap the next panel 1/32 inch over the first. This creates a panel line. Proceed until the complete surface is covered.
Fuel proofing around the fuselage firewall is best achieved by wrapping the film around the face of the firewall and applying a coat of epoxy, thinned 50% with alcohol.
There is no longer any reason why the aluminum finish of many scale RC airplanes cannot be made totally realistic!
Rivets
Most aircraft are held together with rivets and we need a method of simulating their effect on our scale RC airplanes.
For flush rivets on a film base, make a trim iron tool from brass or aluminum tubing. A pitch guide is required, to achieve equal spacing of the rivets. I make the guide from 1/64 inch ply, by drilling holes at the required pitch and diameter, then cutting it in half, along the center line of the holes. This makes a flexible template that can be used to produce flush rivets by marking the film with the tubing tool.
To simulate raised rivets, on scale RC airplanes use a 50/50 mixture of white glue and water. If you are applying them to an aluminum finish then mix in a small amount of aluminum paint or powder. If applying to a painted finish then apply them prior to painting.
An application tool is required. This can be as simple as a toothpick for just a few rivets, but if you have to apply hundreds of them then a better system must be found! Glue bottles and hypodermic needles have been used as well as different types of combs that apply rivets in multiples. If mistakes are made, they can be wiped away with a damp cloth or paper towel.

A good looking system is the Rosie Riveter System from Flite Metal. This uses a template and a special mixture that can make flush or raised rivets, on a Flite Metal or painted surface. Click here for more details.
This system is available in a wide range of scales and will certainly be a much quicker method of applying rivets!
The photo at left shows the system. The template is self adhesive and is applied along the edge of a panel. The "Poly Rivet" material is then applied to each hole.
The template material is then removed and you should have a perfect line of rivets along the edge of the panel!
Click the photo for more information and purchasing details for all Flite Metal products.
Panel Lines
Many scale RC airplanes look much better when panel lines have been applied. If you are using an aluminum finish then the above described methods should give you realistic results.
Some models look OK when black panel lines are applied. I personally do not like the effect for my scale RC airplanes. On film covered models I have used thin stripes of contrasting colored film and iron it on. As an example a light red surface was paneled with a dark red line and a silver surface was highlighted with a charcoal grey line.

The use of a Top Flite SmartStripe Cutting Tool tool will make it a lot easier to make thin strips of film. 1/32 inch strips are no problem for the Smart Stripe.
This little machine uses a #11 hobby knife blade. The only tip I can pass along is to change the blades frequently. A sharp edge is required to give good results.
Of course the Smart Stripe can also be used to make wider strips for decorating non-scale as well as scale RC airplanes.
For further information. please click the photo. The Smart Stripe should be available at your local hobby shop.
Before you start, ensure the surface that you are applying the stripes to is as clean as you can make it. Wipe the surface with a lint free cloth, dampened with rubbing alcohol. Use a trim iron set on low when applying the strips.
Tack one end down and gently stretch the stripe and tack down the other end. Then go to the middle of the line and tack there. Then move to the 1/4 points and tack. Keep repeating this procedure and finally iron the complete length of the line. This way it is possible to lay down long lines and keep them straight.
If your model has a 100% film finish, then when a few lines have been placed, take an iron set on the shrink temperature and quickly pass it over the lines. This should ensure the panel lines are securely bonded and will stay in position for the life of the model.
Of course many scale RC airplanes have a painted finish and require panel lines. There is no reason why the above method cannot be used. Prior to any color coats being applied the panel lines can be applied. Then the color coats are applied. If the panel lines are now removed, a good simulation of recessed panels has been created.
It is also possible to buy 1/32 and 1/64 inch wide chart tape. Try drafting and office supply stores as possible sources.

Get Gloster Gladiator Profile eBook Free

Don't worry your e-mail address is totally secure.


Recent Articles
-
The Bristol Bulldog vintage biplane, of the RAF, in 1930
May 22, 23 10:47 AM
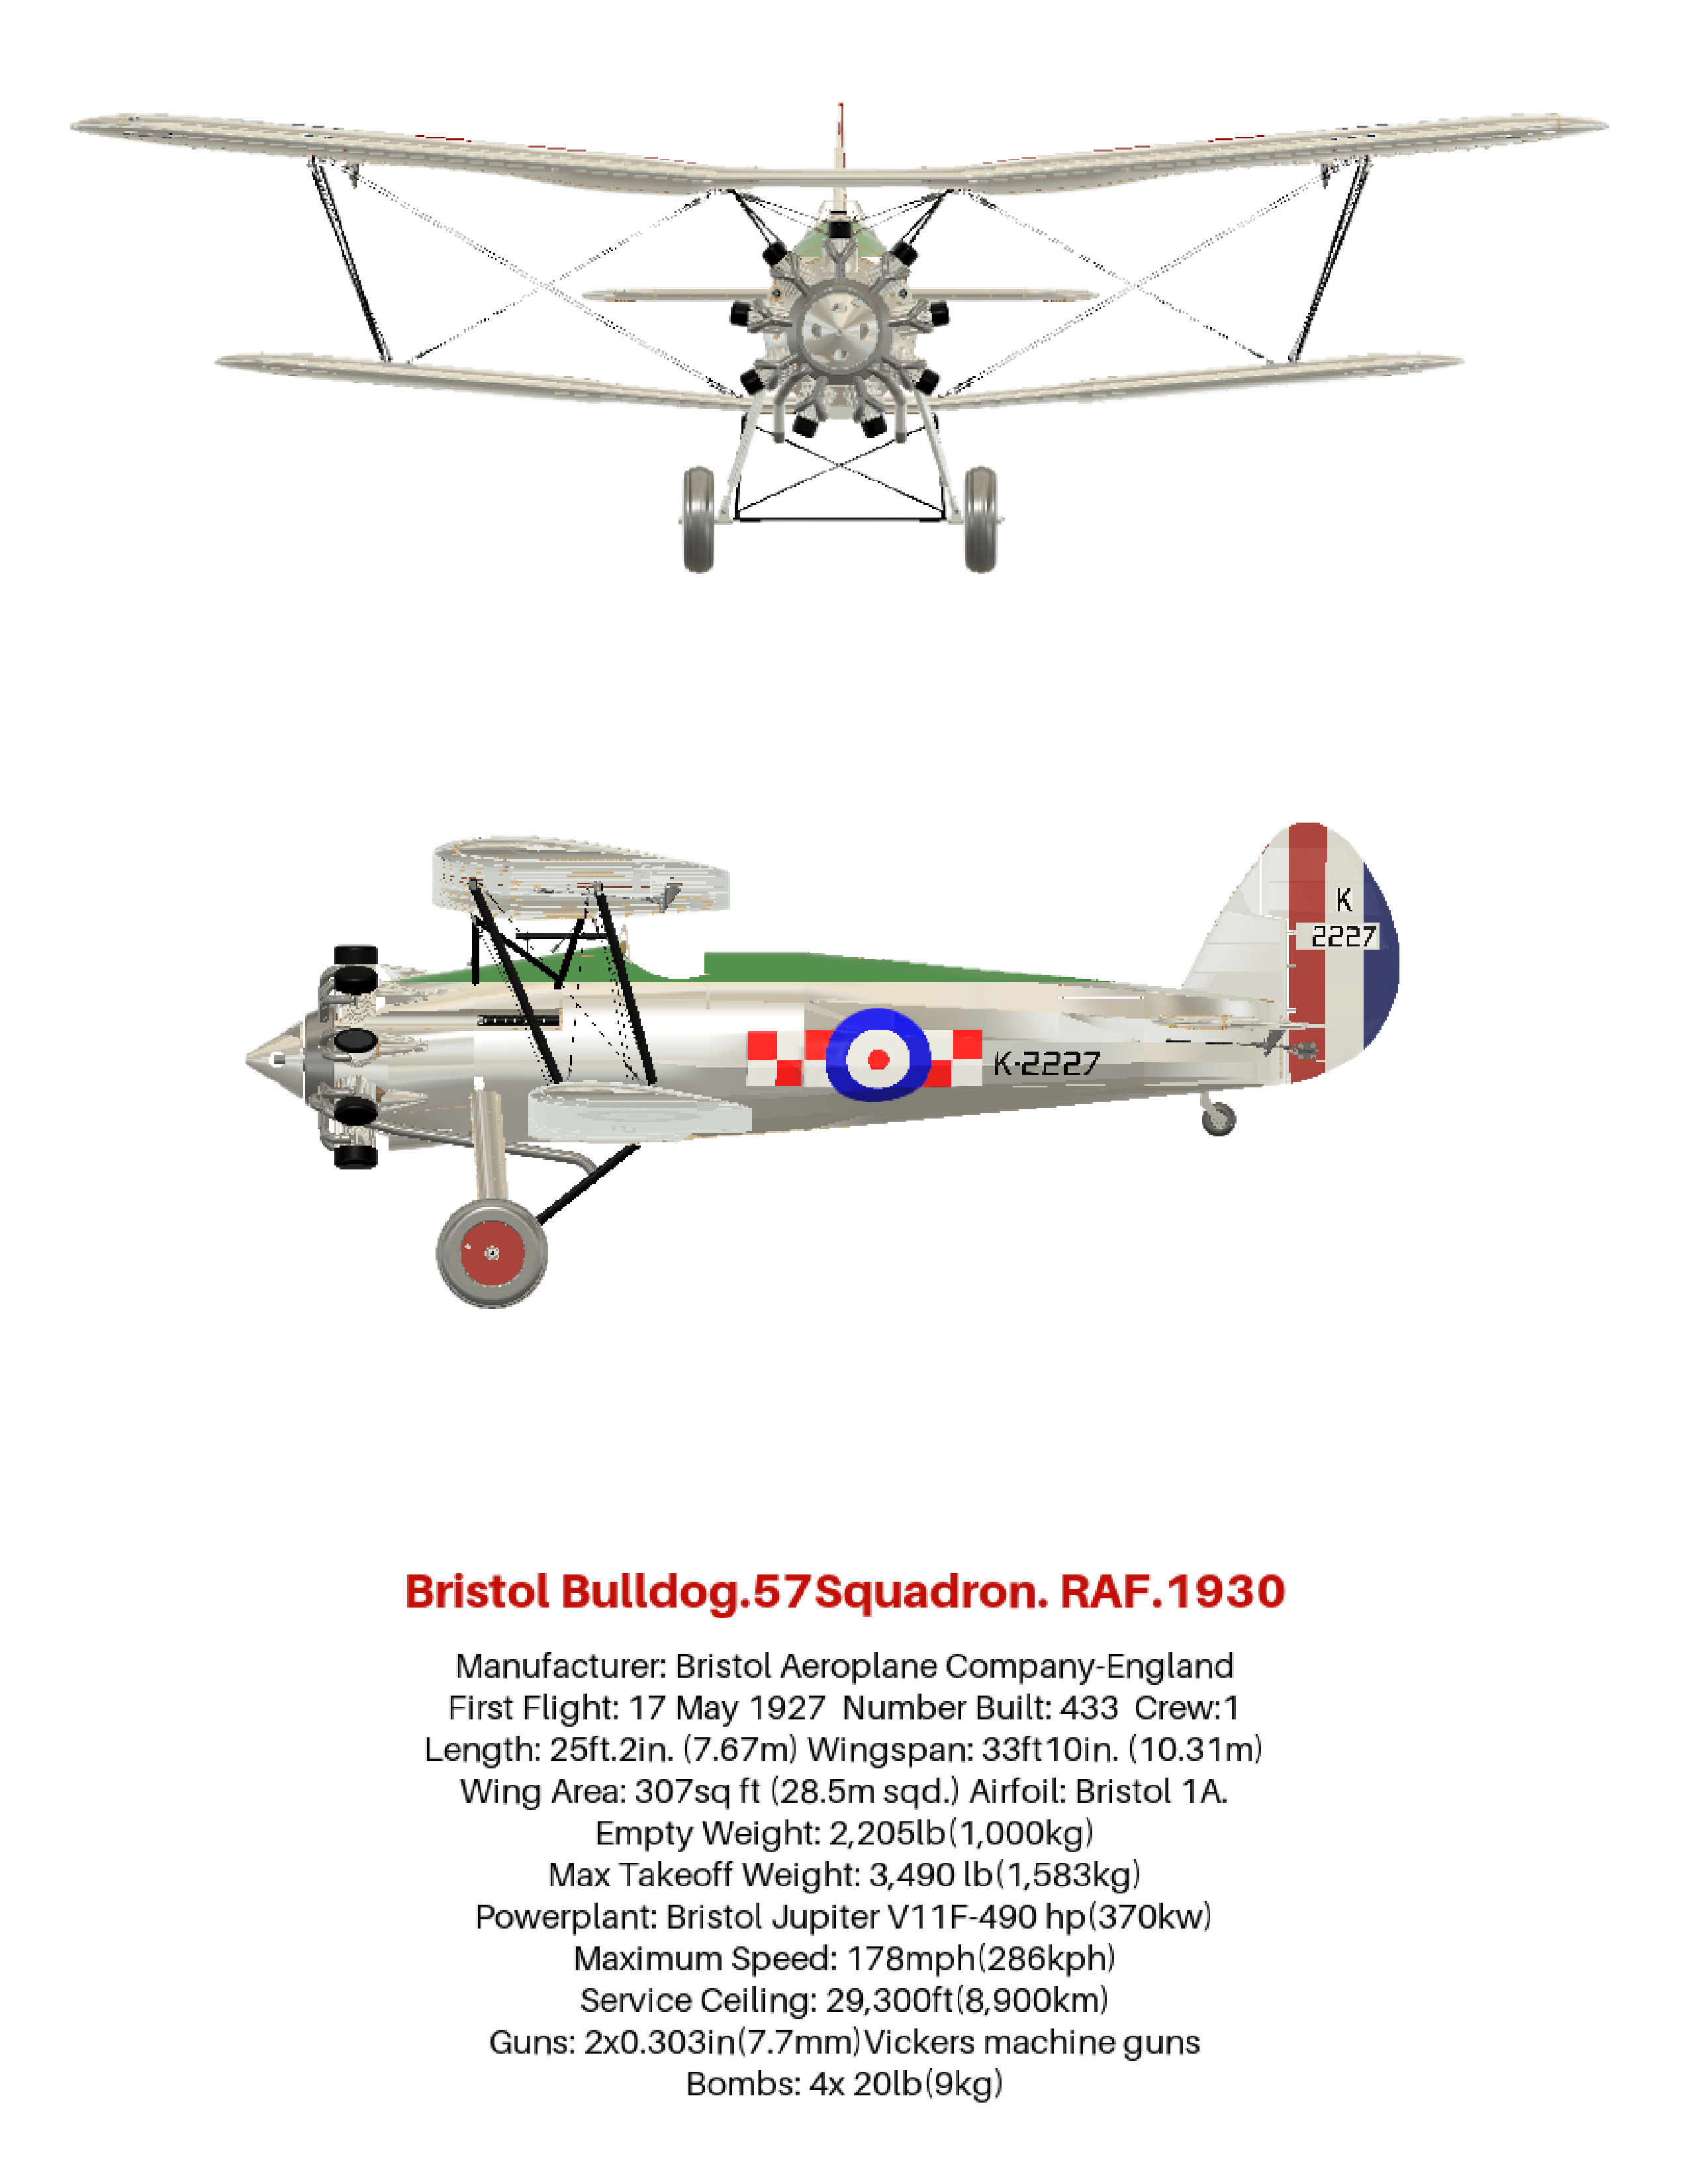 How the aviation art, of the Bristol Bulldog vintage biplane, was produced, using 3D software. Included are photos and links to many aviation gifts, from Zazzle
 -
Aviation gifts For All Airplane Lovers
Apr 20, 23 11:12 AM
 Aviation gifts for every occasion. Give your airplane fanatic friends and relatives the present they will really appreciate! Can be customized to make it truly unique.
 -
RC Retractable Landing Gear: The JP Hobby ER-005 Metal Strut Set.
Dec 19, 22 01:55 PM
 Full details of RC retractable landing gear. For models up to 6 Kg (13.2 lbs). Steerable nose wheel and sequencer for gear doors and brakes. For grass strips.
 -
FLEX RV-8 70CC FLS:ARF and ARFSV.
Nov 02, 22 02:45 PM
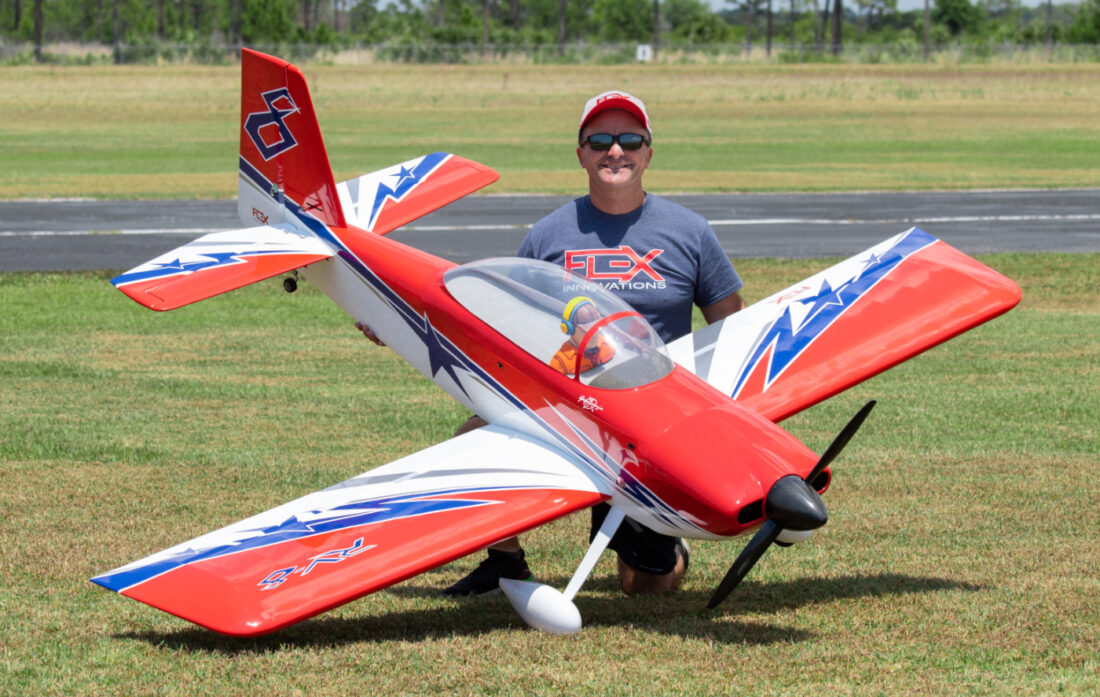 The Flex RV-8 70cc, 35% Scale, 3D RC Airplane. Super lightweight and gas or electric power. Very complete and fast assembly.
New! Comments
Have your say about what you just read! Leave me a comment in the box below.